Category: Home

  • Caring for Your Kitchen Appliances

    Caring for Your Kitchen Appliances

    I remember sitting in a sun-drenched kitchen in Oaxaca, watching an elderly woman scrub her heavy cast-iron skillet with nothing but coarse salt and a bit of patience. There was no expensive, chemical-laden “restoration kit” in sight—just a deep, intuitive respect for the tools that had fed her family for decades. It made me realize how much we’ve been sold on the idea that kitchen appliance care has to be this complex, expensive ritual involving specialized gadgets and endless bottles of synthetic cleaners. We’ve been taught to fear the grime, as if a little bit of wear and tear means the soul of the machine is gone, when really, it’s just part of the story.

    I’m not here to sell you on high-tech solutions or complicated maintenance schedules that take up more time than the actual cooking. Instead, I want to share the honest, stripped-back methods I’ve gathered from living out of a suitcase and cooking in tiny, makeshift kitchens all over the world. My goal is to help you move past the marketing hype and focus on the simple, sustainable habits that actually keep your gear working beautifully. We’re going to treat your tools with the same respect they deserve, ensuring they remain reliable companions for every meal you create.

    Table of Contents

    Honoring Our Tools a Preventative Maintenance Schedule

    Honoring Our Tools a Preventative Maintenance Schedule

    I’ve learned through years of living in tiny apartments and shared kitchens that we tend to treat our gadgets like disposable things. But when you’ve spent a morning watching a craftsman in Kyoto meticulously oiling a wooden spatula, you start to see things differently. Creating a simple preventative maintenance schedule isn’t about being obsessive; it’s about respect. It’s the difference between a blender that dies mid-smoothie and one that hums steadily for a decade.

    I like to break it down by rhythm rather than a daunting checklist. Weekly, it’s the small things—wiping down the seals on the fridge or checking the crumb tray in the toaster. Monthly, I focus on the invisible stuff, like removing limescale from appliances to keep my kettle and espresso machine running smoothly. It’s a quiet ritual, much like the way I wind my old film camera. If you stay ahead of the buildup, you aren’t just extending appliance lifespan; you’re ensuring that the tools meant to nourish you are always ready when the craving hits.

    The Quiet Ritual of Cleaning Kitchen Electronics Safely

    The Quiet Ritual of Cleaning Kitchen Electronics Safely

    There is something almost meditative about the way the light hits a clean countertop in the early morning, before the chaos of breakfast begins. But I’ve learned that keeping that clarity requires more than just a quick wipe-down; it requires a gentle, intentional approach to cleaning kitchen electronics safely. I remember a tiny bistro I stayed at in Lyon where the owner treated her heavy-duty espresso machine like a sacred relic. She never used harsh, abrasive chemicals that could strip the soul from the metal; instead, she used soft cloths and distilled water.

    When I’m working with my own gear, I try to mimic that reverence. Whether it’s a digital scale or a high-end blender, I avoid the temptation to douse everything in spray. Instead, I focus on minimizing moisture near the buttons and ports, using a slightly damp microfiber cloth to lift away the dust and oils that accumulate from daily use. It’s a small habit, but it’s a vital part of extending appliance lifespan without the stress of sudden breakdowns. It’s about treating these tools not as disposable gadgets, but as quiet companions in my culinary journey.

    Small Gestures, Long Lives: My Five Non-Negotiables

    • Listen to the rhythm of your machines. A refrigerator that hums a little too loudly or a toaster that smells slightly of singed dust is trying to tell you something; don’t ignore those small shifts in character before they turn into a breakdown.
    • Clear the path for airflow. Just like we need room to breathe in a crowded market, your oven and fridge need space to circulate air; a quick vacuum of the dust bunnies around the coils can be the difference between a steady chill and a sudden heatwave.
    • Respect the seals. I’ve learned in too many humid coastal towns that a tiny gap in a door seal is an invitation for trouble; checking that your gaskets are soft and clean ensures your energy—and your food—stays exactly where it belongs.
    • Treat your blades with kindness. Whether it’s a blender or a food processor, never force them through something too stubborn; let the motor do the work, and always hand-wash those blades to keep the edge as sharp as a chef’s knife in a mountain village.
    • Keep the grit at bay. A little bit of spilled flour or a stray grain of salt can act like sandpaper over time; a simple, dry wipe-down after the kitchen settles for the night prevents the slow erosion of your most trusted tools.

    Small Acts of Care

    Think of maintenance not as a chore, but as a way to respect the tools that facilitate our most meaningful meals.

    A little bit of consistent, gentle attention—like wiping down a surface or clearing a crumb—prevents the sudden, stressful breakdowns that interrupt our flow.

    Treating your appliances with intention ensures they remain reliable companions in your kitchen, ready to help you recreate the flavors of the world.

    The Soul of the Kitchen

    We often think of our appliances as mere machines, but they are actually the quiet witnesses to our most intimate meals; taking care of them isn’t just about maintenance, it’s about respecting the tools that help us nourish our lives.

    Anouk Verhoeven

    The Heartbeat of the Home

    The Heartbeat of the Home: kitchen tools.

    At the end of the day, keeping your kitchen running smoothly isn’t about following a rigid manual or obsessing over perfection. It’s about those small, intentional acts—the weekly wipe-down of the espresso machine, the careful dusting of the toaster, and the preventative care that keeps your most trusted tools from failing when you need them most. By integrating these tiny rituals into your routine, you aren’t just avoiding expensive repairs; you are ensuring that your kitchen remains a reliable sanctuary for whatever you decide to create. It’s a way of honoring the objects that facilitate our most nourishing moments.

    I often think back to the tiny, sun-drenched kitchens I’ve encountered in my travels, where the tools were worn smooth by decades of use but treated with such profound respect. There is a certain kind of magic in a well-loved space. When we take the time to care for our appliances, we are really taking care of the stories we are about to write through our cooking. So, don’t view maintenance as a chore. Instead, see it as a way to ground yourself in your home, preparing the stage for the next great meal, the next shared laugh, and the quiet beauty of everyday living.

    Frequently Asked Questions

    How often should I actually be deep-cleaning the things I don't use every day, like the heavy stand mixer or the pasta maker?

    I tend to view these heavier pieces as seasonal guests rather than permanent residents. If your stand mixer is just waiting for the next batch of sourdough or a heavy holiday bake, a thorough wipe-down after every use is plenty. But for a true deep clean—getting into those nooks and crevices where flour dust settles—I aim for once every three months, or whenever I notice the machine feels a little less “smooth” in its rhythm.

    Are there any natural, non-toxic ways to get rid of those stubborn odors in my fridge or dishwasher without using harsh chemicals?

    I’ve learned the hard way that heavy-duty cleaners often leave a scent that clashes with the fresh produce I love. For the fridge, a small bowl of activated charcoal or even a bit of baking soda tucked in a corner works wonders for absorbing those lingering smells. For the dishwasher, I usually just toss a cup of white vinegar into a cycle. It’s simple, gentle, and keeps everything smelling clean without the chemical sting.

    I travel so much—is it worth investing in high-end appliances that need constant care, or should I stick to simpler, more rugged tools?

    Honestly, I’ve sat in too many beautiful kitchens with high-end gear that felt more like museum pieces than tools. When you live out of a suitcase, your relationship with “things” changes. I’ve learned to favor rugged, soulful tools—the kind that get better with a little patina. Invest in quality, yes, but prioritize versatility and durability. You want tools that can handle a chaotic morning in a rental kitchen without needing a manual.

  • Preparing Your Backyard for Entertaining

    Preparing Your Backyard for Entertaining

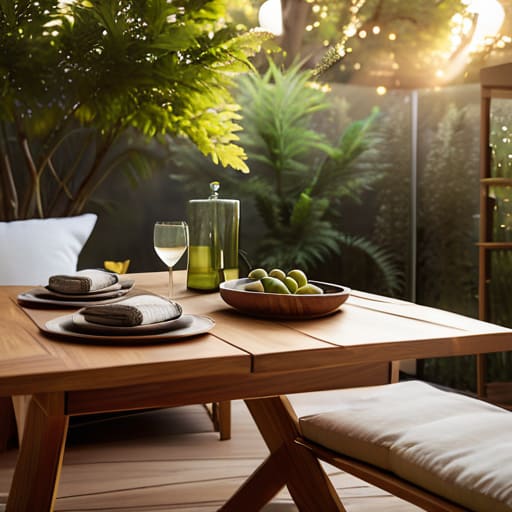
    I remember sitting on a low stone wall in a tiny courtyard in Oaxaca last summer, the air thick with the scent of charred corn and woodsmoke. There were no designer string lights or perfectly coordinated linen napkins; there was just a wooden table, a few mismatched stools, and a heavy ceramic bowl of salsa that smelled like heaven. It struck me then how much we overthink backyard entertaining in our rush to create a “Pinterest-perfect” aesthetic. We spend so much energy worrying about whether our patio furniture matches that we end up stifling the very thing that makes gathering special: the unscripted warmth of being together.

    I’m not here to tell you how to curate an expensive outdoor showroom or follow a checklist of high-end gadgets you don’t need. Instead, I want to share how to strip away the performance and get back to the basics of hospitality. I’ll be sharing my own honest, messy, and deeply sensory approach to hosting—focusing on the food, the atmosphere, and the quiet connections that happen when you finally stop trying so hard and just let people be.

    Table of Contents

    Crafting Intimate Outdoor Dining Area Ideas for Shared Stories

    Crafting Intimate Outdoor Dining Area Ideas for Shared Stories

    I’ve always found that the most meaningful conversations don’t happen across a polished mahogany table in a dining room, but rather around a weathered wooden surface under the open sky. When I’m thinking about outdoor dining area ideas, I tend to steer away from the overly curated looks you see in magazines. Instead, I lean into the imperfect. A few mismatched chairs, a linen tablecloth that’s seen better days, and perhaps a small cluster of weatherproof outdoor furniture tucked into a quiet corner of the garden can create a sense of intimacy that a formal setting just can’t touch.

    It’s about creating a pocket of space where time feels like it’s slowing down. I love using low-level landscape lighting for ambiance—nothing too bright or clinical, just enough to cast a soft glow on the faces of your guests and the steam rising from a shared bowl of pasta. When the light is low and the air is warm, the boundaries between the host and the guest seem to blur. You aren’t just serving a meal; you’re curating a space where people feel safe enough to really settle in and stay long after the plates have been cleared.

    The Art of Hosting Backyard Barbecues With Local Flavors

    The Art of Hosting Backyard Barbecues With Local Flavors.

    When I think about hosting backyard barbecues, I try to steer away from the heavy, processed stuff you see in supermarket ads. For me, it’s all about the seasonality of the ingredients. Last summer, I spent a week in a coastal village where the “barbecue” was really just a simple grill over charcoal, seasoned with nothing but sea salt and wild herbs gathered that morning. I want to bring that same unpretentious spirit to my own gatherings. Instead of a rigid menu, I focus on what’s peaking at the local farmer’s market—maybe some charred heirloom carrots or fish wrapped in citrus leaves.

    It’s less about the spectacle and more about the sensory experience. While I love a well-organized outdoor kitchen setup, the real magic happens when the food smells like smoke and summer rain. I’ve found that if you lean into a few simple summer backyard party themes—like “The Coastal Harvest” or “Midsummer Herbs”—the menu almost writes itself. You don’t need a professional chef; you just need honest ingredients and a bit of fire to bring people together.

    Small Details for a Soulful Backyard Gathering

    • Skip the matching sets and embrace the mismatched. A collection of vintage chairs or a table with a bit of character feels more like a home and less like a showroom, making guests feel instantly more relaxed.
    • Lighting is your most important ingredient. Avoid the harsh overhead glare; instead, string up some warm fairy lights or scatter a few beeswax candles to create that soft, golden glow that keeps conversations lingering long after sunset.
    • Let the menu tell a story of the season. Rather than a massive, overwhelming spread, focus on a few high-quality, local ingredients—maybe some heirloom tomatoes from the farmer’s market or herbs plucked straight from your own windowsill.
    • Curate a low-key soundscape. Music should be the background hum, not the main event. Think acoustic melodies or soft jazz that fills the gaps in conversation without forcing anyone to raise their voice.
    • Create “pockets” of comfort. Beyond the main table, tuck a few floor cushions or a worn-in outdoor rug into a corner. These little nooks invite people to drift away from the group for a quiet, more intimate moment.

    The Heart of the Gathering: Three Simple Truths

    Focus on the atmosphere over perfection; a mismatched chair or a slightly dim string of lights often creates more warmth and better conversation than a sterile, designer setup.

    Let the ingredients lead the way by sourcing from local markets, turning a simple backyard barbecue into a sensory celebration of the current season.

    Prioritize slow, intentional moments—the real magic isn’t in the menu, but in the unhurried space you create for people to actually connect.

    The Soul of the Table

    “A backyard shouldn’t feel like a showroom; it should feel like an extension of your kitchen, where the scent of charred herbs and the hum of low conversation tell a much better story than any perfectly set table ever could.”

    Anouk Verhoeven

    The Soul of the Season

    The Soul of the Season gathering.

    At the end of the day, backyard entertaining isn’t about having a perfectly curated patio or a professional-grade grill. It’s about the intentionality behind the setup—the way a mismatched set of chairs can invite a deeper conversation, or how a menu built around seasonal, local ingredients acts as a bridge between the land and your guests. Whether you are meticulously arranging a small dining nook for intimacy or leaning into the smoky, unhurried chaos of a neighborhood barbecue, you are essentially creating a space for connection. We’ve talked about the logistics, but the true success of a gathering lies in how well the environment allows people to truly settle in.

    As I pack my bags for my next destination, I find myself thinking about the shared meals I’ve had in tiny courtyards across the world. The most memorable ones were never the most expensive; they were the ones where the lighting was soft, the food felt honest, and the clock seemed to stop ticking. I hope you take this inspiration back to your own patch of earth. Don’t wait for the “perfect” moment or a renovated garden to start hosting. Just pull up a chair, light a candle, and embrace the beautiful imperfection of a life lived outdoors. After all, the best stories aren’t found in guidebooks, but around a table under the open sky.

    Frequently Asked Questions

    How do I create a cozy, inviting atmosphere in my backyard without spending a fortune on expensive outdoor furniture?

    Forget the high-end showroom catalogs. To me, coziness isn’t something you buy; it’s something you layer. I always lean into the secondhand: a weathered wooden bench, some mismatched textile cushions from a local market, or even just a few well-placed terracotta pots. String some warm fairy lights through the branches and scatter a few old rugs to soften the ground. It’s about creating a sense of lived-in warmth that feels intentional, not expensive.

    What are some ways to keep guests comfortable and engaged if the temperature drops unexpectedly during an evening meal?

    There’s nothing quite as jarring as that sudden, sharp chill cutting through a warm conversation. I’ve learned that the best way to handle it isn’t to rush everyone inside, but to lean into the coziness. Keep a basket of heavy, textured wool blankets nearby so guests can wrap themselves up. I also love lighting a few extra citronella candles or a small fire pit; the warmth and the flickering light keep the mood grounded and intimate, even as the air turns crisp.

    How can I incorporate seasonal, local ingredients into a backyard menu that feels special but still relaxed and unpretentious?

    The trick is to let the ingredients do the heavy lifting so you don’t have to. Instead of a complex recipe, think about a “market-to-table” approach. If it’s peak tomato season, don’t cook them—just slice them thick with some flaky salt and local olive oil. I always lean into whatever is overflowing at the farmers’ market that morning. It keeps the menu honest, effortless, and deeply connected to the rhythm of the season.

  • How to Display Art on Your Walls

    How to Display Art on Your Walls

    I was sitting in a tiny, sun-drenched kitchen in Marseille last autumn, watching an elderly woman hang a faded, hand-drawn botanical sketch above her stove with nothing more than a bit of twine and a rusted nail. It struck me how much we overcomplicate the concept of a wall art display in our rush to follow interior design trends. We’ve been sold this lie that our homes need curated, expensive galleries to look “finished,” when in reality, a perfectly placed piece of art should feel as natural and unforced as the steam rising from a fresh bowl of bouillabaisse.

    I’m not here to tell you which high-end showrooms to visit or how to achieve a “Pinterest-perfect” look that feels sterile and lifeless. Instead, I want to share how you can use your walls to tell your own story, using the pieces that actually mean something to you. We’re going to explore how to arrange your space with intention, focusing on soul over symmetry and finding beauty in the weathered, the found, and the personal.

    Table of Contents

    Curating a Home Art Collection Like a Local Market

    Curating a Home Art Collection Like a Local Market

    When I wander through the narrow alleys of a coastal village, I never look for the polished, mass-produced prints in the gift shops. Instead, I look for the things that feel earned—a weathered sketch found in a seaside café or a textile fragment tucked away in a merchant’s stall. Curating a home art collection shouldn’t feel like a chore or a math problem; it should feel like a slow collection of memories. I’ve learned that the most soulful spaces aren’t the ones that follow every fleeting minimalist wall decor trend, but the ones that allow pieces to breathe and grow alongside you.

    Rather than rushing to fill every empty patch of plaster, I prefer to treat my walls like a living archive. I often find myself experimenting with different interior design wall arrangements, letting a single, meaningful piece take center stage before slowly introducing smaller, supporting elements over time. It’s about finding a sense of visual balance that doesn’t feel forced. Sometimes, a heavy wooden frame from an antique market provides the perfect anchor for a delicate, hand-pressed botanical print, creating a tension that feels entirely human and unstudied.

    Achieving Visual Balance in Wall Displays With Ease

    Achieving Visual Balance in Wall Displays With Ease

    When I first started setting up my small studio apartments, I used to treat my walls like a chaotic collage, pinning everything up without a second thought. It felt organic, sure, but it often ended up feeling more like clutter than a curated space. I’ve learned that achieving true visual balance in wall displays isn’t about perfect symmetry—which can feel a bit stiff and uninviting—but about managing the “weight” of what you’re hanging. If you have a heavy, dark-framed landscape on one side, you don’t necessarily need an identical piece on the other; you might just need a cluster of smaller, lighter sketches to anchor the opposite corner.

    I find that experimenting with different interior design wall arrangements helps prevent that overwhelming feeling. Instead of trying to force a rigid grid, I like to let the eye wander. I often start by laying my pieces out on the floor first—a bit of a ritual for me—to see how the colors and textures play against one another. It’s much easier to move a photograph or a dried botanical print around on a rug than it is to patch up holes in a fresh plaster wall.

    Finding the Soul of Your Space: Five Ways to Layer Your Walls

    • Don’t be afraid of a little imperfection; I’ve found that a slightly crooked, vintage frame found in a flea market adds much more character than a perfectly symmetrical gallery wall ever could.
    • Think about the light in your room like you would the light in a kitchen—it changes everything—so place your most meaningful pieces where the afternoon sun can catch the texture of the paper or canvas.
    • Mix your mediums to avoid that “showroom” feeling; try pairing a heavy, dark oil painting with a light, pressed botanical sketch to create a sense of depth and history.
    • Use your walls to tell a story rather than just fill a gap, much like how a spice rack tells you about a cook’s heritage, by grouping pieces that share a common thread of color or memory.
    • Leave some breathing room between your frames, because even the most vibrant market stalls need a bit of space to let the individual treasures actually be seen.

    Small Lessons from a Life on the Move

    Treat your walls like a living pantry; don’t feel pressured to finish a collection all at once, but rather let pieces accumulate naturally as you find things that truly resonate with your story.

    Balance isn’t about perfect symmetry or matching frames, but about finding the same visual rhythm you’d find in a well-organized market stall—a mix of textures, heights, and quiet moments.

    Prioritize the soul over the aesthetic; a weathered sketch found in a seaside town will always carry more weight than a mass-produced print, even if it doesn’t perfectly “match” your furniture.

    The Soul of a Room

    “A wall shouldn’t just be a place to hang things; it should be a collection of fragments—a weathered sketch from a rainy afternoon in Porto, or a textured print that reminds you of the salt air—until the room stops feeling like a house and starts feeling like a life lived.”

    Anouk Verhoeven

    Bringing the Soul Home

    Bringing the Soul Home through curated walls.

    At the end of the day, decorating your walls isn’t about following a strict set of interior design rules or buying a matching set of prints from a big-box retailer. It’s about the slow, intentional process of gathering pieces that actually mean something to you—much like how I might hunt for a specific spice in a bustling Marrakech souk. By focusing on visual balance and treating your space like a curated collection of memories rather than a showroom, you create a home that feels lived-in and authentic. Whether it’s a weathered sketch from a cafe in Lisbon or a simple botanical print, the goal is to let your walls tell the story of where you have been and who you are.

    I often find that the most beautiful spaces aren’t the ones that look perfect in a magazine, but the ones that feel deeply personal. Don’t be afraid to leave a gap on the wall for a moment, or to hang something that feels slightly “imperfect” but carries a heavy sense of nostalgia. Your home should be a living, breathing reflection of your journey, constantly evolving as you discover new corners of the world. So, take your time, trust your intuition, and remember that the most beautiful art is the kind that makes you feel at home.

    Frequently Asked Questions

    How do I balance my existing collections with new finds without making the walls feel cluttered or overwhelming?

    I’ve learned that the secret isn’t about adding more; it’s about editing. When I find a new piece—say, a hand-pressed print from a tiny studio in Lyon—I don’t just shove it onto a crowded wall. I treat my walls like a living pantry. I swap out an older, less resonant piece to make room. By leaving “breathable” negative space between items, you allow each story to be heard without the noise of clutter.

    Is there a way to display art that feels more lived-in and organic rather than looking like a staged showroom?

    The secret is to stop treating your walls like a gallery and start treating them like a scrapbook. I never hang things in perfect, sterile rows. Instead, I mix media—a weathered charcoal sketch next to a dried botanical specimen or a fragment of a ceramic plate. Let the pieces overlap slightly or sit at odd angles. It’s about the layers of a life being lived, not a showroom being staged.

    What should I do if I find a piece I love but it doesn't quite match the color palette of my current room?

    Don’t force it to fit. I’ve learned through years of moving between tiny apartments that a piece of art shouldn’t just “match”—it should converse with the room. If a find feels right but the colors clash, try bridging the gap with a frame in a neutral tone, or place it near an object that shares just one subtle hue. Sometimes, that slight tension is exactly what makes a space feel lived-in rather than staged.

  • Maintaining Different Types of Flooring

    Maintaining Different Types of Flooring

    I remember sitting on the cool, terracotta tiles of a small trattoria in Trastevere, watching an elderly woman sweep the entryway with a broom that looked older than she was. There was no heavy chemical scent of lemon-scented bleach, just the faint, earthy smell of stone and damp dust. It hit me then that most modern advice on floor care is completely disconnected from how we actually live. We’ve been sold this idea that maintaining a home requires a cabinet full of aggressive, neon-colored liquids and expensive, specialized machines that promise a “sterile” shine. But honestly? That clinical perfection feels soul-less, like a hotel lobby rather than a place where people actually eat, laugh, and spill a little too much red wine.

    I’m not here to sell you on a twelve-step ritual or a subscription to a boutique cleaning brand. Instead, I want to share what I’ve learned from living out of a suitcase and navigating the kitchens of a dozen different cultures. I’ll show you how to approach floor care through a lens of simplicity and sustainability, focusing on methods that respect your materials and your time. We’re going to strip away the marketing hype and get back to the basics of keeping your space feeling grounded, clean, and—most importantly—truly lived-in.

    Table of Contents

    Natural Floor Cleaning Solutions for a Gentler Home

    Natural Floor Cleaning Solutions for a Gentler Home

    When I was working in the museum archives, I learned how much the chemistry of our cleaning products matters. It’s not just about the shine; it’s about what we’re leaving behind in the spaces where we actually live. I’ve found that leaning into natural floor cleaning solutions—think simple white vinegar diluted in warm water or a splash of lemon—works wonders for wood and tile without filling my small rental with synthetic fumes. It feels much more aligned with the way I want to inhabit a space, treating the ground beneath my feet with a bit of respect rather than just scrubbing it into submission.

    Of course, going green doesn’t mean you can go easy on the effort. I’ve realized that a solid daily floor maintenance routine is actually more effective than any heavy-duty chemical intervention. It’s about the small, mindful actions: sweeping up the grit from the street before it settles, or using a soft microfiber mop to catch the dust. By keeping things simple and gentle, you aren’t just cleaning; you’re preserving the character of your home.

    A Daily Floor Maintenance Routine That Feels Like Living

    A Daily Floor Maintenance Routine That Feels Like Living

    I’ve realized that my apartment, much like the small studios I used to stay in while traveling through Marseille, only feels like home when I stop treating maintenance as a chore and start seeing it as a ritual. Instead of waiting for a massive buildup of dust to tackle on a frantic Saturday, I’ve adopted a simple daily floor maintenance routine that keeps the space feeling grounded. It usually starts with a quick sweep or a pass with a microfiber mop—something gentle that respects the material underfoot.

    It’s less about achieving a sterile, showroom shine and more about protecting the character of the wood or stone. I’ve learned that the most effective way of preventing floor scratches isn’t through heavy-duty chemicals, but through small, mindful habits, like being intentional about where I place my bags or keeping a small mat by the door to catch the grit of the city. When I take these few minutes each morning, the act of tidying feels less like a task and more like a way of settling into my own space, preparing it for the day’s stories.

    Small Rituals for a Grounded Home

    • Listen to your floors; if you notice a new creak or a dull patch in the light, it’s usually the house telling you it needs a little more love or a fresh layer of wax.
    • Keep a soft, dry cloth tucked away for those little moments—like wiping up a spill from a morning espresso—before it has a chance to settle into the grain.
    • Treat your entryway like a transition zone, using a heavy-duty mat to catch the grit of the outside world so your inner sanctuary stays calm and clean.
    • When the seasons shift and the light changes, take a moment to really look at your surfaces; it’s the best time to spot where dust is hiding in the corners.
    • Avoid the temptation of harsh, heavy chemicals that strip the soul out of wood; stick to the gentle methods that preserve the texture and the history of the material.

    The Heart of the Home Underfoot

    Treat floor care as a mindful ritual rather than a chore, using it as a quiet moment to reconnect with the space you inhabit.

    Prioritize gentle, natural ingredients that respect the materials of your home and the air you breathe.

    Focus on consistent, small maintenance habits to preserve the character and soul of your floors over time.

    The Ground Beneath Our Feet

    We spend so much time looking at the horizon when we travel, but there is a quiet, grounding intimacy in the way we care for the surfaces we walk on every day; a clean floor isn’t about clinical perfection, it’s about preparing a stage for the messy, beautiful life that happens upon it.

    Anouk Verhoeven

    The Foundation of a Lived-In Space

    The Foundation of a Lived-In Space.

    At the end of the day, caring for your floors isn’t about maintaining a showroom-perfect surface or chasing a sterile, untouched aesthetic. It’s about the small, intentional choices we make—like opting for gentle, natural cleaners that don’t overwhelm our senses, or establishing a simple routine that prevents the grit of daily life from taking its toll. By shifting our focus from perfection to preservation, we ensure that our homes remain healthy spaces where we can truly kick off our shoes and breathe. Whether you are working with reclaimed wood or cool stone, these practices are really just about respecting the materials that support our everyday movements.

    I often think about how the floors of a bustling family kitchen or a quiet seaside cottage tell a story of their own. They bear the scuffs of dancing, the spills of shared meals, and the soft tread of morning walks. Instead of viewing maintenance as a chore to be checked off a list, I try to see it as a way of tending to my sanctuary. When we take care of the ground beneath our feet, we are essentially honoring the space where our lives actually happen. So, don’t worry about every tiny scratch; just focus on keeping your home warm, grounded, and ready for whatever stories the next season brings.

    Frequently Asked Questions

    How do I protect my floors from the heavy grit and salt that come in with outdoor life without using harsh chemicals?

    It’s the inevitable trade-off of a life lived outdoors, isn’t it? That grit and salt can feel like an intruder. I’ve found that the best defense is a simple, low-impact ritual: a high-quality microfiber mat at every entrance to catch the heavy lifting. For the floors themselves, a quick damp mop with a touch of pH-neutral soap prevents salt buildup without stripping the finish. It’s about gentle, consistent care rather than a chemical battle.

    Are there specific natural cleaners I should avoid if I have delicate wood or stone surfaces?

    If you’re working with delicate wood or stone, please stay far away from vinegar or anything highly acidic, like lemon juice. I’ve seen too many beautiful, aged surfaces lose their luster because of a well-intentioned DIY spray. For stone, even those “natural” abrasive scrubs can leave tiny, permanent scars. Stick to pH-neutral, gentle soaps. It’s less about a deep scrub and more about protecting the character of the material itself.

    How can I tell if my cleaning routine is actually working, or if I’m just moving the dust around?

    It’s a feeling I know well—that frantic, circular cleaning that leaves you wondering if you’ve actually achieved anything. To know if you’re making progress, stop looking for a sterile shine and start looking for the light. When the dust is truly gone, sunlight hits the grain of the wood differently; it looks deeper, not muted. If the air feels lighter and your feet don’t catch on grit when you walk barefoot, you’re doing it right.

  • Keeping Your Linen Closet Orderly

    Keeping Your Linen Closet Orderly

    I remember staying in a tiny, sun-drenched guest house in Provence last summer, where the linen closet was nothing more than a weathered wooden niche in the hallway. There were no color-coded baskets or expensive acrylic dividers, just the scent of dried lavender and the comforting weight of heavy, well-loved cotton. It struck me then how much we’ve been sold on the idea that linen closet organization requires a massive budget and a professional stylist. In reality, the frantic pursuit of a “Pinterest-perfect” aesthetic often strips the soul out of our homes, replacing functional comfort with a sterile, high-maintenance chore that nobody actually has time for.

    I’m not here to sell you on a lifestyle of unnecessary clutter-control gadgets or rigid systems that fall apart the moment you actually use a towel. Instead, I want to share a few grounded, practical methods I’ve gathered from living out of a suitcase and moving between small, lived-in spaces. We’re going to focus on creating a sense of order that feels quiet and intuitive, ensuring your linens are easy to find and even easier to care for, without the performative stress.

    Table of Contents

    Linen Closet Decluttering Tips for a Slower Pace

    Linen Closet Decluttering Tips for a Slower Pace

    When I’m moving between apartments, I’ve learned that clutter isn’t just a mess; it’s a kind of mental noise. To find that sense of calm, I start with a purge. I pull everything out—every stray pillowcase and mismatched sheet—and lay them on the floor. It feels a bit like clearing a workspace before a long writing session. As you sift through, ask yourself if these items actually serve your current rhythm. Most of the time, we hold onto seasonal bedding storage items that we haven’t touched in years, simply because we’re afraid of the empty space they leave behind.

    Once the excess is gone, the real work begins. I’ve found that maximizing vertical shelf space is the secret to keeping things from feeling cramped. Instead of stacking heavy towels in deep, dark piles that eventually collapse, I use small baskets to create distinct zones. I also swear by specific folding techniques for towels—keeping them uniform and compact—so I can actually see what I have at a glance. It turns a chore into a quiet, meditative ritual.

    Maximizing Vertical Shelf Space in Small Nooks

    Maximizing Vertical Shelf Space in Small Nooks

    When I moved into my current apartment, I realized that most storage spaces are designed for a life that doesn’t actually exist—one with endless, cavernous cupboards. In reality, we usually deal with narrow, awkward nooks that feel more like afterthoughts. To make sense of these tight spots, I’ve learned that maximizing vertical shelf space is less about brute force and more about rhythm. Instead of stacking heavy quilts in one massive, unstable tower, I prefer using slim, breathable fabric bins. This allows me to stack items higher without the whole pile collapsing every time I reach for a single pillowcase.

    It’s also where I’ve found the most success with specific folding techniques for towels. By rolling them tightly or using a precise file-fold method, I can turn a deep, dark shelf into a functional library of textiles. This approach keeps everything visible and accessible, rather than burying your favorite hand towels at the bottom of a mountain of cotton. When you treat your shelves like a curated collection rather than a dumping ground, even the smallest corner begins to feel intentional and calm.

    Small Rituals for a More Intentional Space

    • Grouping by texture and weight. I’ve found that there’s a certain peace in reaching for a heavy, waffle-weave cotton towel versus a light linen sheet; organizing them by how they feel against the skin makes the morning ritual feel more grounded.
    • The art of the uniform fold. It isn’t about perfection, but about creating a sense of visual quiet. When everything is folded to the same width, the chaos of a busy day stays outside the bedroom door.
    • Using baskets for the small things. Instead of letting pillowcases or extra sets of napkins drift into a messy pile, tucking them into a simple wicker or canvas basket keeps the shelves looking intentional rather than cluttered.
    • Seasonal rotation based on the light. Just as I move cities to follow the seasons, I move my heavy wool throws to the back of the closet when the air turns warm, keeping only the light, breathable fabrics at arm’s reach.
    • Scent as a wayfinder. I like to tuck a small sachet of dried lavender or cedar between the folded linens; it makes opening the closet feel like a small, sensory gift to yourself.

    Small Rituals for a Calmer Home

    Treat your linen closet like a well-stocked pantry; keep only what you actually use and love to touch, letting go of the faded, scratchy towels that no longer serve a purpose.

    Use natural textures, like wicker baskets or simple cotton wraps, to create a sense of visual quiet that makes reaching for a fresh sheet feel like a small, grounding luxury.

    Organize by frequency of use rather than just size, ensuring your daily essentials are always within easy reach, much like the way a chef keeps their most-used spices closest to the stove.

    The Texture of Order

    Organizing a linen closet isn’t really about the perfect stack of towels; it’s about creating a small, quiet sanctuary of tactile comfort that makes coming home feel like a soft landing.

    Anouk Verhoeven

    The Art of Living Simply

    Organized linen closet: The Art of Living Simply.

    At the end of the day, organizing a linen closet isn’t just about stacking towels or making sure every sheet set is tucked neatly into its assigned nook. It’s about the cumulative effect of those small decisions—decluttering the things that no longer serve us, utilizing every inch of vertical space, and creating a system that actually breathes with the rhythm of our daily lives. When we move away from the chaos of excess and toward a more intentional way of storing our essentials, we aren’t just tidying a cupboard; we are curating a sense of ease for our future selves.

    I’ve learned through years of moving between different cities and small apartments that our homes are most beautiful when they feel intentional rather than cluttered. There is a quiet, profound dignity in a well-kept space, much like the way a perfectly seasoned cast-iron skillet tells the story of a thousand meals. As you finish organizing your linens, I hope you realize that this isn’t a chore to be checked off a list, but a way to honor your environment. By tending to these small, domestic corners, we create the mental space necessary to truly inhabit our lives.

    Frequently Asked Questions

    How do you decide which old, worn-out towels are actually worth keeping and which ones should be repurposed for the kitchen?

    I usually follow a simple rule of thumb: if it still feels soft against my skin, it stays in the linen closet. But if a towel has lost that plushness—even if it’s still clean—it’s time for a demotion. I find that those slightly frayed cotton towels make the most honest kitchen rags. They absorb spills better than anything new, turning a moment of clutter into a small, functional ritual in the heart of the home.

    Is there a way to keep linen sheets smelling fresh without using those heavy, artificial-scented laundry boosters?

    I’ve always found that the most beautiful scents are the ones that don’t feel forced. Instead of those heavy, synthetic boosters, I tuck a few drops of pure lavender or cedarwood oil onto a cotton ball and tuck it into a small muslin bag between the folds. It’s subtle, like the scent of a herb garden after rain. You can also try dried eucalyptus tucked into a corner—it keeps things feeling airy and honest.

    How do you organize everything so it stays functional when you're constantly rotating seasonal bedding?

    The secret for me is treating my linen closet like a seasonal pantry. I use breathable cotton bins to group everything by weight: heavy wool and flannel in one, light linen and percale in another. When the weather shifts, I don’t just move things; I swap entire “kits.” Having a dedicated spot for each season means I’m not digging through piles, just reaching for the texture that matches the morning light outside.

  • Understanding Home Lighting Design

    Understanding Home Lighting Design

    I remember sitting in a tiny, dimly lit bistro in Marseille last autumn, watching the way a single, low-hanging amber lamp transformed a simple bowl of bouillabaisse into something almost sacred. There was no harsh overhead glare, no sterile fluorescent buzz—just a soft, intentional glow that made the world feel small and safe. It hit me then that most people approach home lighting design like they’re trying to light up a surgical suite or a supermarket aisle, completely forgetting that we don’t live our lives under high-intensity task lights. We live in the shadows and the soft edges, in those quiet moments between the chaos of the day.

    I’m not here to sell you on expensive designer fixtures that look better in a magazine than they do in a real living room. Instead, I want to share what I’ve learned from living out of a suitcase and staying in countless small, soulful spaces: how to use light to actually feel at home. We’re going to strip away the jargon and focus on the practical, sensory ways to layer warmth into your space, ensuring your home feels less like a showroom and more like a sanctuary.

    Table of Contents

    The Quiet Magic of Layered Lighting Techniques

    The Quiet Magic of Layered Lighting Techniques.

    When I was working in museums, I learned how light can completely change the way we perceive an object—it can make a simple ceramic bowl look like a relic or just another piece of clutter. I try to bring that same intentionality into my own living spaces. Instead of relying on a single, harsh overhead light that flattens everything, I’ve become obsessed with layered lighting techniques. It’s about creating depth. I like to mix a low-slung floor lamp for reading with a few small, strategically placed lamps on side tables. This approach mimics the way light naturally pools in a cozy bistro, making even a tiny studio feel much more expansive and soulful.

    The real secret, though, lies in the nuance of warm vs cool light temperatures. I’ve realized that nothing kills a mood faster than a clinical, blue-toned bulb when you’re trying to unwind with a glass of wine. I prefer warmer tones that mimic the golden hour, which makes a room feel lived-in rather than just “decorated.” By using accent lighting for interiors—perhaps a small spotlight on a stack of well-loved cookbooks or a textured vase—you create those little pockets of visual interest that make a house truly feel like a home.

    Choosing Warm vs Cool Light Temperatures for Comfort

    Choosing Warm vs Cool Light Temperatures for Comfort

    I’ve spent many evenings in dimly lit tapas bars in Seville, realizing that the atmosphere wasn’t just about the food, but the way the amber glow hit the wooden tables. It’s a lesson that translates perfectly to our own living rooms. When we talk about warm vs cool light temperatures, we’re really talking about the emotional rhythm of a room. Warm light—think of that soft, honeyed hue—is my go-to for creating a sanctuary. It mimics the sunset and tells your brain it’s okay to finally unwind.

    On the flip side, cool light has its place, though I find it a bit clinical if used alone. I usually reserve those crisper, blue-toned bulbs for the kitchen or a workspace where I need to actually see the texture of my ingredients or the fine print in a book. The trick is finding a balance so your home doesn’t feel like a sterile office or a dark cave. If you’re working with a tight floor plan, a thoughtful lighting layout for small spaces can use these temperature shifts to define zones without needing heavy walls, making a tiny studio feel much more expansive and intentional.

    Small Shifts to Bring Your Space to Life

    • Stop relying on the “big light.” That single, harsh overhead fixture is the enemy of a cozy evening. Instead, think in clusters—a small lamp on a side table here, a dimmable sconce there—to create pockets of intimacy that mimic the soft glow of a bistro at dusk.
    • Let your light follow your rhythm. Just as I change my pace when moving from a bustling market to a quiet museum, your home should change too. Use dimmers to transition your space from the bright, focused energy of a morning coffee ritual to the soft, hazy stillness of a late night.
    • Don’t forget the corners. A dark corner can make a room feel smaller and more clinical. Placing a small, low-wattage lamp in a neglected nook adds depth and a sense of discovery, much like finding a hidden alleyway that leads to something beautiful.
    • Use light to highlight what you love, not just what you need. Whether it’s a stack of well-loved cookbooks or a single piece of pottery, a soft accent light can turn a mundane object into a quiet focal point, giving your room a sense of history and soul.
    • Match your bulbs to the mood of the task. There’s a specific kind of clarity needed for reading a map or chopping vegetables, but for everything else, aim for a glow that feels organic. If the light feels too sharp or “blue,” it will always feel like a sterile waiting room rather than a home.

    Small Changes, Big Shifts: Making the Most of Your Light

    Think in layers, not just single sources; a well-lit room needs the soft glow of a lamp in the corner to balance out the harshness of a ceiling light.

    Prioritize warmth over brightness; look for bulbs that mimic the golden hour of a late afternoon rather than the clinical sting of an office.

    Let light guide your mood; use dimmers or smaller, localized lights to signal to your brain that it’s time to slow down and actually inhabit your space.

    Lighting as an Emotional Map

    We often think of light as a way to see what’s in front of us, but in a home, it’s actually about how we feel. It’s the difference between a space that demands your attention and one that holds you close, like the soft, amber glow of a kitchen at dusk when the world finally feels quiet enough to breathe.

    Anouk Verhoeven

    Bringing the Light Home

    Bringing the Light Home with layered lighting.

    At the end of the day, designing your home’s lighting isn’t about following a strict set of architectural rules or buying the most expensive fixtures on the market. It’s about the intentionality behind how we see our spaces. By embracing the nuance of layered lighting—mixing those soft ambient glows with focused task lights—and being mindful of the temperature of your bulbs, you transform a house from a mere structure into a living, breathing sanctuary. It’s the difference between a room that feels clinical and one that feels like it’s giving you a quiet, warm embrace the moment you walk through the door.

    As I move from one temporary kitchen to another, I’ve realized that the way a space is lit dictates how we interact with the people inside it. A well-lit table invites long, rambling dinners and deep conversations, while a dim corner offers the perfect refuge for a book and a glass of wine. Don’t be afraid to experiment, to dim the lights, or to let a single lamp create a pocket of intimacy. Lighting is the invisible ingredient that flavors the atmosphere of your life. Treat it with the same care you would a slow-simmered sauce; it is the soul of the home.

    Frequently Asked Questions

    How do I balance functional task lighting with that cozy, lived-in feeling without making my small apartment feel cluttered?

    I’ve learned this the hard way in tiny studio apartments: don’t try to do everything with one big overhead light. That’s how a space starts feeling clinical. Instead, think of light like seasoning—you want layers. Use a slim, focused desk lamp for your actual work, but tuck a small, warm amber lamp in a corner or on a shelf nearby. It creates depth without taking up physical space, keeping the room functional but soft.

    Are there specific ways to use lighting to make a space feel more connected to the natural rhythm of the day?

    I’ve always found that our bodies crave the same shifts in light that I notice when moving between cities. To mimic the natural rhythm, I lean into “circadian lighting.” In the morning, use bright, cooler tones to mimic the clarity of dawn—it’s like that first burst of sunlight hitting a market stall. As evening approaches, I dim everything and switch to low, amber-hued lamps. It signals to your brain that the day is winding down.

    When I'm shopping for new lamps or fixtures, how can I tell if the light quality is actually good or just looks pretty in the store?

    I’ve learned this the hard way in dimly lit bistros across Europe. Don’t just look at the lamp’s silhouette; look at the shadow it casts. A good fixture should diffuse light softly, not create harsh, jagged lines on the wall. If you can, check the CRI (Color Rendering Index) on the box. You want something above 90. If the light makes your food look gray or sickly instead of vibrant, it’s just a pretty object, not a good light.

  • Choosing Sustainable Kitchenware

    Choosing Sustainable Kitchenware

    I was sitting in a tiny, sun-drenched kitchen in Oaxaca last spring, watching an elderly woman stir a clay pot with a spoon so worn it looked like a piece of driftwood. There was no “eco-friendly” branding on her counter, no recycled plastic packaging, and certainly no high price tag—just a tool that had clearly been part of her family for decades. It made me realize how much we’ve been sold a lie about what sustainable kitchenware actually looks like. We’ve been conditioned to think that being “green” means buying a whole new set of expensive, aesthetically pleasing gadgets from a boutique brand, when the real truth is often much simpler and far less polished.

    I’m not here to give you a curated list of trendy products that will end up in a landfill by next season. Instead, I want to talk about the tools that actually deserve a place in your life. I’ll be sharing what I’ve learned from markets and kitchens around the world about finding pieces that endure through use. We’re going to look past the marketing hype and focus on quality, repairability, and the quiet beauty of objects that are built to last.

    Table of Contents

    A Non Toxic Cookware Guide for Slow Living

    A Non Toxic Cookware Guide for Slow Living

    When I was working in those small coastal museums, I learned how much history is held in the objects we touch every day. The same applies to our kitchens. For me, moving toward a sustainable kitchen lifestyle isn’t about a complete, overnight overhaul; it’s about being intentional with what we let touch our food. I’ve spent far too much time cooking in pans with scratched, peeling coatings that left a metallic tang in my morning omelets. Now, I look for materials that actually breathe and age with me.

    If you’re looking for a starting point, my personal non toxic cookware guide begins with cast iron and stainless steel. They are heavy, yes, and they require a bit of ritual to maintain, but they are nearly indestructible. Unlike the cheap, coated alternatives that end up in landfills every few years, these pieces become part of your family’s history. I recently picked up a seasoned carbon steel skillet from a maker in Lyon, and it feels less like a kitchen tool and more like a permanent companion for every meal I prepare.

    Finding Beauty in Eco Friendly Kitchenware Materials

    Finding Beauty in Eco Friendly Kitchenware Materials

    When I’m wandering through a new city, I tend to notice how different cultures treat their most basic tools. In some places, it’s the heavy, seasoned cast iron that feels like an heirloom; in others, it’s the lightness of hand-carved wood. I’ve realized that choosing eco friendly kitchenware materials isn’t just about being environmentally conscious—it’s about the tactile connection we have with the things we touch every single day. There is something deeply grounding about using a spoon that was once part of a tree, or a bowl that feels warm and organic in your hands.

    I’ve started moving away from the sterile, mass-produced feeling of modern gadgets. Instead, I look for biodegradable cooking tools that carry a bit of soul. Think of bamboo cutting boards that age beautifully or linen cloths that soften with every wash. These aren’t just items to fill a drawer; they are part of a sustainable kitchen lifestyle that prioritizes quality over sheer volume. When we surround ourselves with materials that actually belong to the earth, our kitchen stops feeling like a laboratory and starts feeling like a home.

    Small Shifts for a More Mindful Kitchen

    • Buy what you actually need, not what looks good on a curated feed. I’ve learned the hard way that a drawer full of “eco-friendly” gadgets I never use is just more clutter. Start with one high-quality piece—like a heavy cast iron skillet—that can last a lifetime rather than three cheap sets that end up in a landfill by next year.
    • Look for the stories behind the materials. When I’m wandering through local markets, I look for wood that feels seasoned and stone that has weight to it. Whether it’s bamboo, cork, or recycled glass, try to understand where it came from and if the person who made it was treated with respect.
    • Embrace the beauty of the “mended.” There is something so grounding about using a ceramic bowl with a visible crack repaired with gold, or a wooden spoon that has been worn smooth by years of stirring stews. Sustainability isn’t about perfection; it’s about honoring the things we already own.
    • Avoid the “disposable” mindset entirely. I stopped buying those rolls of plastic wrap and paper towels months ago. Instead, I keep a stack of beeswax wraps and cotton cloths in my bag. They might take a little more effort to wash, but they feel much more intentional.
    • Shop small and local whenever possible. Instead of clicking “buy now” on a massive corporate site, see if there’s a local potter or a small-scale maker in the city you’re visiting. There is a profound connection to food and culture when you know the hands that shaped the vessel you’re eating from.

    Small Shifts for a More Intentional Kitchen

    Choose tools that age with you; a well-loved cast iron pan or a hand-carved wooden spoon carries more soul—and lasts much longer—than anything mass-produced.

    Prioritize what goes into your food by opting for non-toxic materials, ensuring your kitchen remains a sanctuary for health rather than a source of hidden chemicals.

    Buy less, but buy better, focusing on quality pieces that honor the environment and the slow, rhythmic process of cooking from scratch.

    The Weight of a Good Tool

    “I’ve realized that a kitchen isn’t just a place for meal prep; it’s a collection of stories. When you choose a tool that’s built to last—something made of honest, earth-bound materials—you aren’t just buying a utensil, you’re investing in a piece of your own history that won’t end up in a landfill by next season.”

    Anouk Verhoeven

    The Heart of the Home

    Sustainable kitchenware: The Heart of the Home.

    At the end of the day, choosing sustainable kitchenware isn’t about following a perfect set of rules or buying every eco-friendly gadget on the market. It’s about making more intentional choices—from opting for non-toxic, heavy-bottomed pans that will last a decade, to appreciating the tactile warmth of hand-carved wooden spoons. We’ve looked at how the materials we touch every single day, whether it’s cast iron or organic ceramics, impact both our health and the planet. By moving away from the disposable culture of cheap, coated non-stick pans and leaning into tools that endure, we create a kitchen that feels less like a showroom and more like a sanctuary.

    As I sit in small, sun-drenched kitchens around the world, I’ve realized that the most meaningful meals aren’t defined by the complexity of the recipe, but by the care we put into the process. When we invest in pieces that tell a story, we aren’t just cooking; we are participating in a slower, more mindful way of existing. I hope you find those pieces that speak to you—the ones that feel right in your hand and grow more beautiful with every use. Let your kitchen be a place where slow living isn’t just a concept, but a tangible, delicious reality that you experience one meal at a time.

    Frequently Asked Questions

    How can I tell if a "sustainable" brand is actually making a difference or if it's just clever marketing?

    I’ve learned the hard way that “eco-friendly” labels can be incredibly loud and often quite empty. To see past the polished Instagram aesthetic, I look for radical transparency. I want to see the actual supply chain, not just a leaf icon. Does the brand mention their specific factory conditions or their material sourcing? If they can’t tell me exactly where that bamboo or recycled steel came from, I usually take my money elsewhere.

    Is it worth the investment to replace my old non-stick pans with something like cast iron or stainless steel?

    Honestly, it’s one of the best investments you can make. I used to rely on those cheap non-stick pans, but they always felt disposable—and frankly, a bit hollow. Switching to cast iron or stainless steel changes your relationship with cooking. They require a bit more patience and care, sure, but they develop a soul over time. They aren’t just tools; they’re companions that actually get better the more you use them.

    What are some ways to extend the life of my wooden spoons and cutting boards so I don't have to keep buying new ones?

    I’ve learned the hard way that a good wooden spoon is more like a companion than a tool. To keep them from drying out or cracking, never leave them soaking in the sink—that’s how they warp. Instead, hand wash them with mild soap and dry them immediately. Every few months, rub them down with a bit of food-grade mineral oil. It keeps the grain nourished and helps them endure for years.

  • Growing Culinary Herbs at Home

    Growing Culinary Herbs at Home

    I remember sitting on a sun-drenched stone step in a small village outside of Marseille, watching an elderly woman prune her tiny, chaotic patch of rosemary and thyme. There was no expensive irrigation system or designer ceramic pots in sight—just a weathered wooden crate and a lifetime of knowing exactly when the soil needed a drink. It struck me then how much we’ve overcomplicated the idea of an herbal garden. We’ve been sold this myth that you need a sprawling backyard and a PhD in botany to cultivate something meaningful, when really, the most vibrant flavors come from the simplest, most unpretentious arrangements.

    I’m not here to give you a checklist of high-end gardening tools or a guide to the most aesthetic windowsill setups you’ll find on social media. Instead, I want to share what I’ve learned from traveling through kitchens that treat herbs as living essentials rather than mere decorations. I’ll show you how to build a functional herbal garden that actually survives your lifestyle, focusing on the sensory connection between the plant in your hand and the meal on your plate. Let’s strip away the hype and get back to the dirt.

    Table of Contents

    Finding the Best Herbs for Small Spaces

    Finding the Best Herbs for Small Spaces

    When I was staying in a tiny studio in Lisbon last spring, my windowsill became my entire world. I realized quickly that you don’t need a sprawling backyard to cultivate something meaningful; you just need to understand the specific herb garden sunlight requirements of your little corner. For those of us living in apartments, I’ve found that basil and mint are the most forgiving companions. They thrive in those bright, sun-drenched spots that most people overlook, turning a cramped kitchen into something that feels alive and fragrant.

    The real secret, though, lies beneath the surface. I used to think any dirt would do, but I quickly learned that the right potting mix for culinary herbs is what prevents that dreaded root rot. You want something airy and well-draining, almost like the soil I encountered in the small terraced gardens of the Mediterranean. If you’re just starting, don’t overcomplicate it. Focus on a few high-impact plants, keep your drainage consistent, and you’ll find that even the smallest ledge can become a vibrant, edible sanctuary.

    Mastering Organic Herb Cultivation at Home

    Mastering Organic Herb Cultivation at Home.

    There’s a certain kind of magic in knowing that the basil in your pasta didn’t come from a plastic sleeve in a supermarket, but from a pot on your own windowsill. When I first started experimenting with organic herb cultivation, I made the mistake of treating every plant the same, which is a quick way to end up with wilted stems and sad leaves. The secret, I’ve found, lies in respecting their individual temperaments. You can’t just throw them into any old dirt; finding a high-quality, well-draining potting mix for culinary herbs is the foundation of everything. It gives the roots room to breathe, much like how a traveler needs a bit of space to truly settle into a new city.

    I also learned the hard way that light is everything. Every windowsill has its own personality, and you have to match your plants to those specific herb garden sunlight requirements. My rosemary thrives in the harsh, direct glare of the afternoon sun, while my mint prefers the softer, dappled light of a north-facing corner. It’s a bit like learning the rhythm of a new neighborhood—once you understand the patterns, everything just starts to grow.

    Small Lessons from My Kitchen Windowsill

    • Pay attention to the light; I’ve learned the hard way that while rosemary loves a sun-drenched ledge, mint is much happier tucked away in a slightly shadier corner of the kitchen.
    • Don’t overthink the watering—most of my herb mistakes come from being too eager, so I’ve learned to wait until the soil actually feels dry to the touch before reaching for the can.
    • Always harvest from the top down, pinching off the little leaves rather than stripping the bottom branches; it encourages the plant to grow bushier and more resilient.
    • Group your plants by their thirst levels, keeping the water-lovers together so you aren’t constantly playing a guessing game with your watering schedule.
    • Keep a small notebook nearby to jot down how different soil mixes affect the scent of your basil or thyme—it’s amazing how much a tiny change in nutrients can alter the aroma of a plant.

    Bringing the Market Home

    You don’t need a sprawling countryside estate to grow your own flavors; even a sun-drenched windowsill can host a thriving collection of basil or thyme that transforms a simple meal.

    Embracing organic methods isn’t just about avoiding chemicals, it’s about respecting the lifecycle of the plant and ensuring that the aroma hitting your senses is as pure as what you’d find in a local village market.

    Cultivating herbs is a lesson in patience and observation, turning a daily kitchen chore into a grounding ritual that connects you to the seasons and the soil.

    The Scent of Connection

    There is something profoundly grounding about pressing your thumb against a leaf of bruised rosemary or fresh thyme; it’s a sensory bridge that connects the soil beneath your feet to the very soul of the dishes we call home.

    Anouk Verhoeven

    Bringing the Garden Home

    Bringing the Garden Home with indoor herbs.

    At the end of the day, cultivating an herbal garden isn’t about having a perfectly manicured landscape or a massive backyard. It’s about the small, intentional choices we make—selecting the right varieties for our windowsill, understanding the specific needs of our soil, and leaning into organic methods that respect the rhythm of nature. Whether you are squeezing a sprig of fresh rosemary into a simple pasta dish or simply enjoying the scent of crushed basil on a warm afternoon, you are participating in a deeply ancient tradition of self-sufficiency. By mastering these basics, you turn your living space into something more than just a place to sleep; you turn it into a living, breathing pantry.

    As I sit here in my current rental, looking at the slightly messy rows of mint and thyme on my kitchen ledge, I’m reminded that these plants do more than just season our food. They anchor us. In a world that often feels too fast and too disconnected, there is something profoundly grounding about getting your hands in the dirt and watching a tiny seed transform into something fragrant and useful. I hope you find that same sense of connection in your own little green corner. Don’t worry about making it perfect; just focus on the sensory joy of it all. After all, the most beautiful gardens are the ones that actually get used.

    Frequently Asked Questions

    How do I know if my small balcony or windowsill is getting enough sunlight for more demanding herbs like rosemary or thyme?

    I remember sitting on a tiny balcony in Lisbon, watching how the light shifted against the tiles. To test your own space, try the “shadow test.” If you can clearly see a sharp, defined shadow from your hand, you’ve got the bright, direct sun rosemary craves. If the shadows are blurry or faint, it’s likely too shaded. If you’re stuck in the middle, maybe stick to mint or parsley for now.

    Is it worth it to grow everything from seed, or should I start with established nursery plants to avoid the initial struggle?

    Honestly, it depends on how much patience you have left after a long day of travel. If you’re craving that slow, meditative connection, starting from seed is beautiful—there’s something grounding about watching a tiny life emerge from the dirt. But if you just want to smell fresh basil in your pasta by next week, buy the nursery plants. Don’t let the initial struggle turn your kitchen garden into a chore instead of a joy.

    How can I keep my herbs tasting vibrant and flavorful if I'm growing them in containers rather than directly in the ground?

    Honestly, growing in containers is a bit of a balancing act. Since the soil volume is so limited, the nutrients get depleted much faster than they would in the ground. I’ve found that the secret is frequent, light feeding—think organic liquid seaweed rather than heavy salts. Also, don’t let them get root-bound; if the flavor starts fading, it’s usually a sign they need a slightly larger home or a fresh boost of compost.

  • Setting Up a Home Coffee Station

    Setting Up a Home Coffee Station

    I spent three months living out of a single rucksack in Southeast Asia, and if there is one thing I learned, it’s that you don’t need a $2,000 espresso machine to find peace in the morning. I’ve seen enough “aesthetic” social media feeds to know that the obsession with high-tech gadgets and marble countertops is mostly just performative clutter. Most people think a perfect coffee station setup requires a dedicated kitchen wing and a degree in barista science, but that’s just not true. To me, the ritual is about the tactile warmth of a ceramic mug and the scent of freshly ground beans, not how many blinking lights your machine has.

    I’m not here to sell you on a lifestyle you can’t maintain or a collection of expensive tools that will just gather dust. Instead, I want to share how to curate a small, functional corner that actually serves your rhythm, whether you’re in a tiny studio apartment or a temporary rental. My goal is to help you build a space that prioritizes the sensory experience—the aroma, the heat, the quiet—over the hype. Let’s focus on what actually matters: creating a ritual that feels like home, no matter where you are.

    Table of Contents

    Finding Your Rhythm With Home Barista Essentials

    Finding Your Rhythm With Home Barista Essentials

    When I’m moving between rentals, I’ve learned that the gear you carry matters less than the ritual you build. You don’t need a professional-grade laboratory to enjoy a decent morning; you just need a few home barista essentials that actually speak to your pace. For me, that means a reliable hand grinder and a scale that doesn’t take up half the counter. It’s about finding that sweet spot where the tools feel like an extension of your hands rather than a chore to clean up.

    If you’re working with limited real estate, don’t feel pressured to buy a massive setup. I’ve found that a compact coffee station for small kitchens works best when it’s tucked into a corner or even a repurposed side table. It’s less about the sheer amount of equipment and more about the flow. I always think about countertop coffee organization in terms of movement—keeping the beans, the grinder, and the cups within arm’s reach so the process feels intuitive. When everything has its place, the morning feels less like a scramble and more like a moment of stillness.

    Espresso Machine Placement for Quiet Morning Rituals

    Espresso Machine Placement for Quiet Morning Rituals

    When I’m scouting for a new place to stay, I find myself instinctively looking at the kitchen counters first. It isn’t about luxury; it’s about where the light hits and how much breathing room you have to actually exist in the morning. Deciding on your espresso machine placement is less about following a blueprint and more about understanding your own movement. If you’re someone who needs a moment of silence before the world wakes up, I suggest tucking the setup away from the main thoroughfare of the kitchen. There is something deeply grounding about having a dedicated nook that doesn’t feel like it’s in the middle of a high-traffic zone.

    For those of us living in smaller apartments or traveling light, finding a compact coffee station for small kitchens is a constant puzzle. I’ve learned that you don’t need a sprawling dedicated zone to make it feel intentional. Sometimes, the best way to create a ritual is to utilize a corner that usually goes ignored, perhaps near a window where you can watch the street come to life while the steam rises from your cup. It’s about creating a sense of purposeful stillness amidst the daily clutter.

    Small Details That Make the Difference

    • Don’t overthink the aesthetics; I’ve found that a simple ceramic tray or even a worn wooden cutting board helps ground your setup and keeps everything from feeling scattered.
    • Keep your most-used tools—like your favorite heavy ceramic mug and your grinder—within arm’s reach so the process feels like a flow rather than a chore.
    • I always keep a small, dedicated space for my notebook nearby; there’s something about the ritual of brewing that makes me want to jot down a thought or a scent I encountered at a market the day before.
    • Lighting is everything for those early, quiet hours, so try to position your station near a window or add a small, warm lamp to avoid that harsh, artificial feeling.
    • Instead of buying matching sets, mix in a few pieces you’ve found in local flea markets or small boutiques to give your corner a sense of history and soul.

    Small Rituals, Big Impact

    Focus on utility over aesthetics; a coffee station should serve your morning flow, not just look good for a photo.

    Create a dedicated sensory space by keeping your favorite beans, a heavy ceramic mug, and your notebook within arm’s reach.

    Let the setup evolve with you, much like a well-traveled kit, adding pieces only when they truly enhance your daily ritual.

    More Than Just Counter Space

    A coffee station shouldn’t feel like a showroom of expensive gadgets; it should feel like a small, intentional altar to the morning, where the scent of roasted beans and the weight of your favorite ceramic mug ground you before the rest of the world rushes in.

    Anouk Verhoeven

    Finding Your Flow

    Finding Your Flow with intentional coffee rituals.

    At the end of the day, building a coffee station isn’t about collecting every gadget seen on a social media feed. It’s about the intentionality behind it—selecting a few reliable essentials that work for your specific rhythm and placing them in a spot that invites you to slow down. Whether you’ve prioritized a high-end grinder or simply found the perfect sunlit corner for your pour-over setup, the goal is to create a space that feels like a sanctuary rather than a chore. When your tools are organized and your ritual is streamlined, the act of making coffee stops being a task and becomes a meaningful pause in an otherwise frantic morning.

    I often think back to the tiny, cramped kitchens I’ve encountered in my travels, from the coastal villages of Portugal to the bustling markets of Hanoi. They rarely had much room, but they always had heart. Your coffee station should be much the same; it doesn’t need to be expansive to be profound. It is a small, private altar to the simple pleasure of a warm cup and a quiet moment of reflection. So, don’t worry about perfection or aesthetic trends. Just build a space that honors your morning, one slow, fragrant sip at a time.

    Frequently Asked Questions

    How do I keep my coffee station from feeling cluttered when I'm working in a small apartment?

    When I moved into my tiny studio in Lisbon, I learned quickly that visual noise is just as draining as physical clutter. My rule is to treat my coffee station like a curated shelf in a museum: if it doesn’t serve a purpose or bring a sense of calm, it doesn’t stay. I tuck my beans into small ceramic jars and keep my tools on a single wooden tray. It makes the ritual feel intentional, not messy.

    Are there specific scents or textures I should consider to make the space feel more grounding?

    I’ve always found that sensory details are what turn a corner of a room into a sanctuary. For me, it’s about the tactile. I love a heavy, ceramic mug that feels substantial in my hands—nothing plastic or flimsy. To ground the space, I’d suggest a small wooden tray to catch spills and perhaps a linen cloth. As for scent, skip the synthetic candles; a tiny jar of dried cardamom or even just the earthy aroma of whole beans is much more honest.

    What are some ways to incorporate vintage or found objects into my setup without losing functionality?

    I’ve always found that a space feels more “lived-in” when it tells a story. I love using a heavy, chipped ceramic bowl from a flea market to hold my stir spoons, or an old brass tray to catch stray coffee grounds. The trick is to keep the heavy lifting—the grinder or the kettle—on a stable, modern surface, while letting the vintage pieces act as the soulful, functional accents around them.

  • Designing a Dedicated Reading Space

    Designing a Dedicated Reading Space

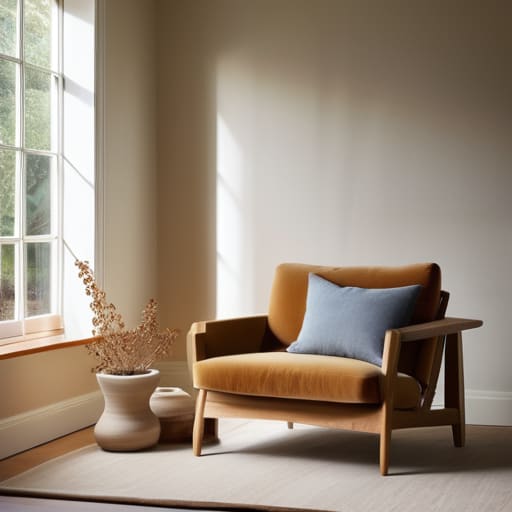
    There is a specific kind of magic in finding a quiet corner in a foreign city—a sun-drenched windowsill in a Lisbon apartment or a velvet armchair tucked away in a dim, dusty bookstore in Edinburgh. These moments of stillness are where I truly feel I can breathe, yet I often find that when I return to my own temporary spaces, that sense of sanctuary is missing. We spend so much of our lives rushing from one task to the next that we forget how to actually inhabit our surroundings. I’ve realized that creating a dedicated space for slow living isn’t about luxury; it’s about intentionality. Searching for the right reading nook ideas is really just a way of asking ourselves how we can better protect our own peace in a world that never seems to stop moving.

    In this post, I want to share five ways to cultivate that same sense of soulful refuge right where you are. I’ll be walking you through my favorite reading nook ideas that focus on texture, light, and that essential feeling of being completely grounded. Whether you have a sprawling living room or just a tiny corner in a studio apartment, these tips will help you build a sanctuary that feels less like furniture and more like a home.

    Table of Contents

    The Window Seat Sanctuary

    Cozy linen cushions at The Window Seat Sanctuary.

    There is something about watching the light shift across a room that makes a book feel more intimate. I remember a small guesthouse in Provence where the window seat was nothing more than a wide wooden ledge covered in linen cushions, but it felt like the most sacred space in the house. If you have a deep windowsill, don’t feel pressured to buy a massive armchair; sometimes, just adding a few soft textures and a view of the street can transform a simple ledge into a place where you can truly disappear.

    The Corner of Soft Shadows

    The Corner of Soft Shadows reading nook.

    We often think we need bright, overhead light to read, but I’ve found that the most soulful reading spots thrive in the dimmer corners of a room. I love the idea of reclaiming that awkward, unused corner near a bookshelf and turning it into a cocoon. By placing a single, low-slung chair there and adding a small, warm lamp, you create a visual anchor that tells your brain it’s time to slow down.

    The Textile Cocoon

    Cozy reading nook called The Textile Cocoon.

    When I move between cities, I realize that we often try to build “spaces” when what we actually need is “feeling.” You don’t need a dedicated room to have a reading nook; you just need a way to signal to your body that it’s time to rest. I’ve spent many afternoons curled up on a floor cushion in a tiny apartment in Berlin, surrounded by a few well-loved textiles that made the hard floor feel like a private retreat.

    The Library Nook

    There is a specific kind of magic that happens when you are physically surrounded by the stories you love. I’ve always felt that a reading nook shouldn’t just be a chair, but an extension of your bookshelf. If you can tuck a small seat directly against your collection, the books themselves become the wallpaper of your world, providing a sense of intellectual companionship that a blank wall never could.

    The Breakfast Nook Pivot

    We often associate reading with solitude, but I find a lot of joy in the quiet moments of a shared space. If you have a small kitchen table or a breakfast nook, don’t view it solely as a place for caffeine and toast. During the slow hours of a rainy morning, a table can easily transition into a contemplative workspace or a reading station, provided you have the right setup.

    Finding Your Quiet Center

    A reading nook isn’t about expensive furniture; it’s about carving out a small, intentional sanctuary where you can actually hear your own thoughts.

    Treat your corner like a sensory experience—think soft textures, natural light, and a space that feels as grounding as a quiet morning in a local market.

    The best nook is the one that invites you to slow down and stay a while, turning a simple corner of your home into a ritual of stillness.

    The Soul of a Space

    A reading nook isn’t just about a comfortable chair or a well-placed lamp; it’s about carving out a small, sacred territory where the rush of the world stops, allowing you to finally settle into the quiet rhythm of a story.

    Anouk Verhoeven

    Finding Your Own Quiet Rhythm

    Whether you end up repurposing a dusty corner with a single velvet armchair, layering textures with floor cushions, or building a window seat that catches the afternoon light, the goal remains the same. Creating a reading nook isn’t about following a strict interior design manual or buying expensive furniture; it is about intentionality. It is about choosing a specific spot in your home and declaring it a sanctuary—a place where the distractions of the digital world fade into the background, leaving only you and the pages in front of you. By focusing on light, comfort, and a sense of enclosure, you turn a mere piece of furniture into a personal retreat.

    At the end of the day, these small, curated corners are what make a house feel like a home. They remind me of the tiny, sun-drenched alcoves I’ve found in old libraries across Europe, where time seems to hold its breath just for a moment. I hope you find that same sense of stillness in your own space. Don’t worry if it isn’t “picture perfect” or ready for a magazine spread; the most meaningful spaces are often the ones that feel a little worn in and deeply personal. So, grab your current read, find your light, and simply settle in.

    Frequently Asked Questions

    How can I create a cozy reading corner in a small apartment without it feeling cluttered?

    When space is tight, I’ve learned that less is always more. Instead of adding more furniture, look for “found” corners—that little sliver of light between a window and a bookshelf. I try to keep things intentional: one comfortable chair, a single soft throw, and perhaps a small side table for my tea and notebook. By focusing on texture rather than volume, you create a sanctuary that feels like a quiet retreat, not a storage unit.

    What kind of lighting works best for reading at night without disturbing someone else in the room?

    I’ve learned through many long nights in tiny, shared guest houses that lighting is everything. If you’re sharing a space, skip the overheads and reach for a small, warm-toned clip-on reading light or a dimmable amber lamp. I love using a directed task light with a warm bulb; it creates a little pool of intimacy for your book without spilling light across the whole room, keeping the rest of the space in a soft, restful shadow.

    Are there specific textures or materials that help make a reading nook feel more grounded and inviting?

    For me, it’s all about the tactile connection. I tend to gravitate toward materials that feel like they have a history—think heavy, lived-in linen, chunky wool throws, or even a smooth wooden side table. I find that synthetic, “perfect” fabrics feel a bit hollow. To make a space feel grounded, you need textures that invite you to touch them, much like the worn leather of a well-traveled journal or a hand-woven rug from a local market.