Category: Food

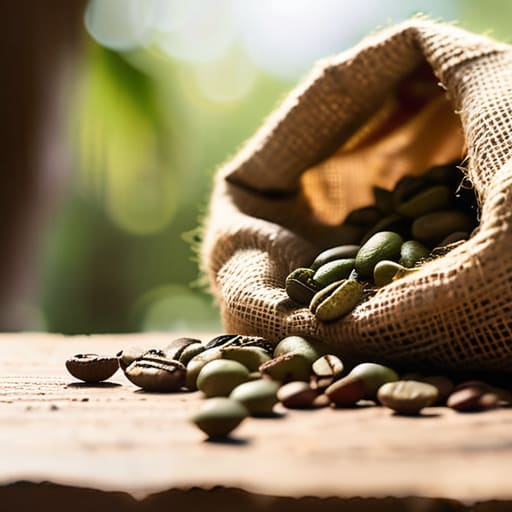
  • How to Identify Coffee Tasting Notes

    How to Identify Coffee Tasting Notes

    I was sitting in a cramped, sun-bleached cafe in Oaxaca last spring, watching a man stare intensely at a tiny porcelain cup as if it held the secrets of the universe. The barista, draped in a linen apron that probably cost more than my monthly rent, leaned in to whisper that the beans possessed “subtle hints of bergamot and toasted jasmine.” Honestly? It felt like a performance. I’ve spent years traveling through markets and kitchens, and I’ve realized that the industry has turned coffee tasting notes into this elitist, almost intimidating language that keeps people away from the very thing they should be enjoying.

    I’m not here to teach you how to perform a professional cupping or memorize a complex lexicon just to feel worthy of a morning brew. Instead, I want to help you actually taste what is in your cup. I’m going to strip away the pretension and share how you can identify the real, earthy flavors that connect a bean to its origin. We’re going to move past the marketing jargon and focus on sensory intuition, so you can finally find the joy in every single sip.

    Table of Contents

    Finding Meaning Through a Coffee Flavor Wheel Guide

    Finding Meaning Through a Coffee Flavor Wheel Guide

    When I first sat down with a professional coffee flavor wheel guide, I felt a bit like an anthropology student staring at a complex map of a culture I didn’t yet speak. It looked clinical, almost intimidatingly precise. But as I sat in a sun-drenched courtyard in Addis Ababa, watching the steam rise from my cup, the geometry of the wheel started to make sense. It isn’t just a chart; it’s a way to bridge the gap between a physical sensation and the landscape where the bean was born.

    Instead of just saying a coffee is “good,” the wheel helps me pinpoint those specific coffee bean origin characteristics—the way a high-altitude Ethiopian bean might dance with jasmine notes, or how a Sumatran roast feels heavier on the tongue. I’ve learned to pay attention to the mouthfeel in coffee tasting, noticing how some brews coat the palate like silk while others are crisp, almost like sparkling water. It’s a slow, meditative process of learning to translate a liquid into a memory of a place.

    Identifying Coffee Flavor Profiles in Quiet Morning Moments

    Identifying Coffee Flavor Profiles in Quiet Morning Moments

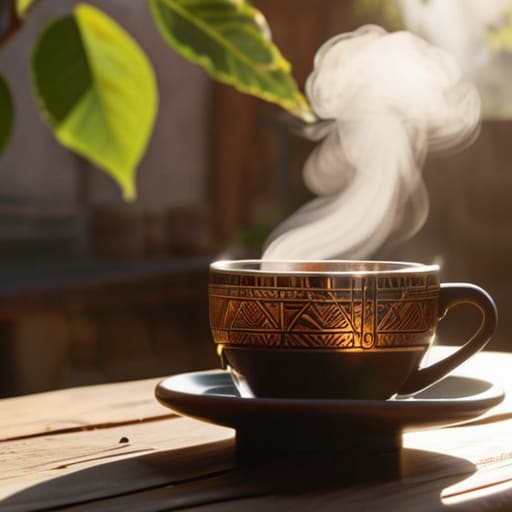
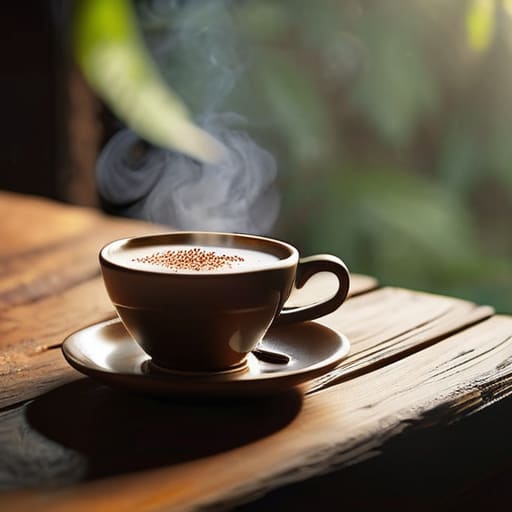
    I’ve learned that you can’t rush a sensory experience. If I’m sitting in a drafty studio in Berlin or a sun-drenched courtyard in Oaxaca, the ritual remains the same: I need silence. To truly practice identifying coffee flavor profiles, you have to strip away the noise of the morning. I find that if I’m scrolling through my phone or rushing to catch a train, the nuances vanish. Instead, I wait for that moment when the steam settles, allowing me to focus on the mouthfeel in coffee tasting—that weight on the tongue that tells you if a brew is tea-like and delicate or syrupy and bold.

    There is something deeply grounding about this slow approach. It reminds me of my time in the museums, where you have to stand still to actually see the texture of an artifact. When I approach my morning cup, I’m not just looking for acidity; I’m looking for the story of the soil. By paying attention to the subtle shifts in temperature, I can better trace the coffee bean origin characteristics back to the specific altitude and shade where they were grown.

    Small Rituals for Sharpening Your Palate

    • Stop rushing the first sip. I’ve learned that the most complex notes—the ones that remind me of dried stone fruit or toasted hazelnuts—only reveal themselves once the coffee has cooled just a little bit. Let it sit for a few minutes; let it breathe.
    • Keep a sensory notebook, but don’t just write down “citrus.” Try to capture the feeling. Does the acidity hit like a bright, sharp lemon, or is it more like the soft, mellow sweetness of a ripe peach? Connecting the flavor to a memory makes it stick.
    • Engage your nose before your tongue. Most of what we perceive as “flavor” is actually aroma. Before you take a sip, lean in and inhale the steam. If you can smell a hint of jasmine or dark chocolate in the air, your brain will be primed to find it in the liquid.
    • Clear the palate with water, but do it intentionally. I like to take a sip of room-temperature water between different brews to reset. It’s not just about cleaning your mouth; it’s about giving yourself a moment of stillness to prepare for the next story the coffee is trying to tell.
    • Look for the “aftertaste” or the finish. A great cup of coffee doesn’t just vanish the moment you swallow; it leaves a lingering presence. Pay attention to how long that sweetness or slight bitterness stays with you—it’s often the most honest part of the profile.

    Lessons from My Notebook

    Stop trying to “solve” the flavor like a puzzle; instead, let the notes arrive naturally as you sit with the warmth of the cup.

    Use the flavor wheel as a loose map rather than a strict rulebook, allowing your own sensory memory to guide you.

    True tasting happens in the quiet spaces between sips, where you can actually connect the acidity or sweetness to the landscape that grew the bean.

    More Than Just a Descriptor

    Tasting notes aren’t just a checklist of fruits or florals to tick off; they are the sensory fingerprints of a specific place and a specific season, captured in a single, steaming cup.

    Anouk Verhoeven

    The Slow Sip

    Experiencing sensory storytelling with The Slow Sip.

    At the end of the day, learning to navigate a flavor wheel or pinpointing a specific acidity isn’t about becoming a rigid expert or memorizing a technical lexicon. It’s about building a bridge between the liquid in your cup and the landscape where it grew. Whether you are identifying the bright, citrusy snap of an Ethiopian roast or the heavy, chocolatey warmth of a Sumatran bean, you are essentially practicing a form of sensory storytelling. By paying attention to these nuances, you transform a mindless morning ritual into a deliberate act of connection, allowing the complexities of the coffee’s origin to settle in your mind just as much as on your palate.

    So, the next time you find yourself sitting in a quiet corner of a new city, don’t rush through your caffeine fix just to check a box on your itinerary. Lean in. Let the steam hit your face and listen to what the beans are trying to tell you about the soil, the rain, and the hands that harvested them. Coffee tasting is less about “correctness” and more about cultivating presence. It is a small, steaming reminder that even in our busiest moments, there is a whole world of flavor waiting to be discovered, one slow, intentional sip at a time.

    Frequently Asked Questions

    How can I tell the difference between a coffee that actually tastes like fruit and one that just has a fruity aftertaste?

    It comes down to how the flavor sits on your tongue. If it’s just a fruity aftertaste, you’ll notice a fleeting sweetness or a hint of acidity that lingers only after you swallow. But when the coffee actually tastes like fruit, the flavor feels structural. It’s bright and juicy, almost like you’re biting into a piece of citrus or a ripe berry. You can feel that vibrant, tart energy right in the middle of the sip.

    Is it possible to learn these tasting notes without having a professional palate, or am I just imagining things?

    Honestly? You aren’t imagining things, and you definitely don’t need a professional palate to start. Most of the “notes” we talk about are just our brains trying to make sense of sensory data. It’s less about being an expert and more about being present. If a cup reminds you of a toasted marshmallow or a rainy afternoon, that’s your truth. Trust your senses; they know more than a textbook ever will.

    Do the specific brewing methods I use at home change how I should be interpreting the flavor wheel?

    Absolutely. I’ve learned the hard way that how you brew is just as much a storyteller as the bean itself. If I’m using a French press, those heavy oils might mask the delicate floral notes I’d catch in a pour-over. It’s like listening to a song through a thick curtain versus standing center stage. Your method acts as a filter—it can either sharpen the bright acidity or soften the edges into something more velvety.

  • Making Authentic Ramen at Home

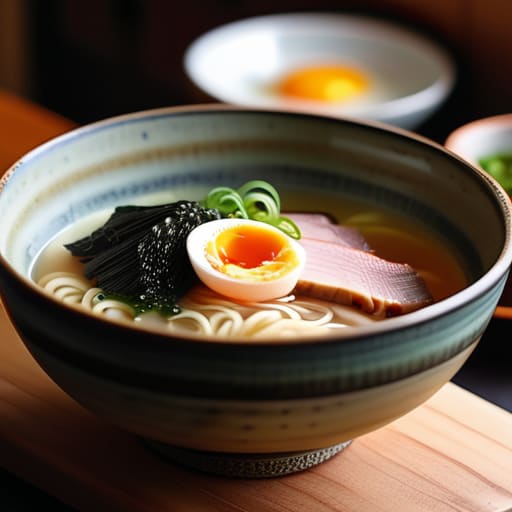
    Making Authentic Ramen at Home

    I used to think that learning how to make ramen required a professional kitchen and a three-day commitment to simmering bones in a sterile apartment. I spent years chasing that “authentic” feeling in high-end restaurants, only to realize I was missing the point entirely. The truth is, the soul of a bowl isn’t found in expensive, specialized equipment or a dozen complicated steps; it’s found in the rhythm of the process and the quality of a few key ingredients. I learned this not in a culinary school, but in a cramped, steam-fogged kitchen in Osaka, watching an elderly woman balance flavors with nothing more than a wooden spoon and a lifetime of intuition.

    In this guide, I’m stripping away the culinary pretension to show you the real way to approach your kitchen. I won’t give you a list of impossible-to-find additives or hype-filled techniques that leave you exhausted. Instead, I want to share a grounded, no-nonsense method for building deep, layered flavors at home. We are going to focus on the essentials—the broth, the tare, and the noodles—so you can create a bowl that feels less like a recipe and more like a quiet, comforting moment.

    Table of Contents

    Recipe Details

    Total Time: 35 minutes
    Difficulty: Easy

    Ingredients

    • 1 pack instant ramen noodles
    • 2 cups chicken bone broth
    • 1 tablespoon soy sauce
    • 1 teaspoon minced garlic
    • 1 soft-boiled egg
    • 1 sheet nori seaweed
    • 1 stalk sliced green onions
    • 1 teaspoon chili oil

    Recipe Instructions

    Step 1

    Start with the broth, because this is where the soul of the bowl lives. Don’t rush it; if you’re using bones, simmer them low and slow for hours until the liquid feels velvety and rich. I usually keep a small notebook nearby during this stage just to jot down how the scent shifts from raw and heavy to something deeply savory and comforting.

    Step 2

    While your broth is doing its slow work, let’s focus on the tare, which is essentially the concentrated seasoning at the bottom of your bowl. Whether you choose a salty shio or a deep, fermented miso, remember that this is the heartbeat of your flavor profile. Mix it carefully so it’s ready to marry with the broth the moment it hits the bowl.

    Step 3

    Now, for the noodles. If you can find fresh, alkaline noodles from a local Asian grocer, grab them—they have that specific springy texture that instant varieties just can’t replicate. Boil them in a separate pot of plain water, not your broth, to ensure the starch doesn’t cloud up your beautiful, clear liquid.

    Step 4

    Prepare your toppings with the same intention you’d use for a seasonal market find. I’m a sucker for a soft-boiled egg with a jammy, golden center, but don’t overlook the importance of simple things like charred scallions or a sheet of nori. These aren’t just garnishes; they are the textures that make the meal feel complete.

    Step 5

    The final assembly is a bit of a ritual. Pour your hot, seasoned broth into your pre-warmed bowl, whisk in your tare, and then gently nestle the noodles into the liquid. Arrange your toppings with a bit of quiet intention, making sure everything is visible, and serve it immediately while the steam is still rising.

    Mastering Tonkotsu Broth Techniques for Deep Umami Flavor Profiles

    Mastering Tonkotsu Broth Techniques for Deep Umami Flavor Profiles

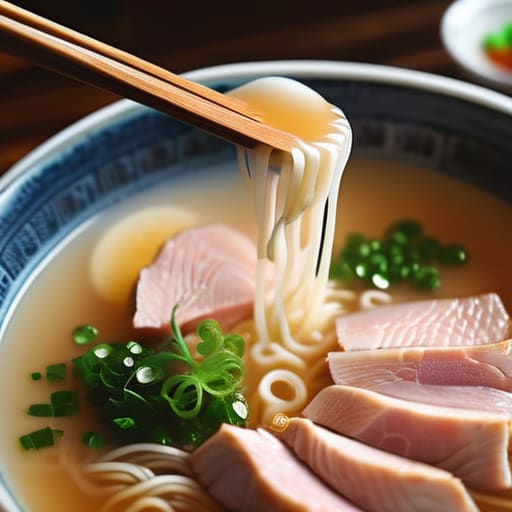
    The real secret to a transformative bowl isn’t just the ingredients, but the patience required for the tonkotsu broth techniques that turn simple bones into liquid gold. In my time spent in small, steam-heavy kitchens in Fukuoka, I learned that the creaminess comes from a vigorous, rolling boil. This constant motion emulsifies the fats and collagen, creating those rich, milky umami flavor profiles that coat the back of a spoon. If you’re looking for something lighter, you might lean toward an authentic shoyu ramen recipe, but there is something deeply primal about the weight of a true pork bone broth.

    Don’t let the complexity intimidate you, though. Even if you aren’t boiling bones for eighteen hours, you can elevate your bowl with thoughtful ramen toppings ideas. I always suggest never skipping the marinated ajitama eggs; that jammy, soy-stained yolk acts like a secondary sauce that cuts through the richness of the broth. It’s these small, intentional layers—the texture of the egg against the silkiness of the soup—that turn a quick meal into a moment of genuine connection.

    The Art of Making Alkaline Noodles at Home and Perfect Marinated Ajitama Eg

    The Art of Making Alkaline Noodles at Home and Perfect Marinated Ajitama Eg

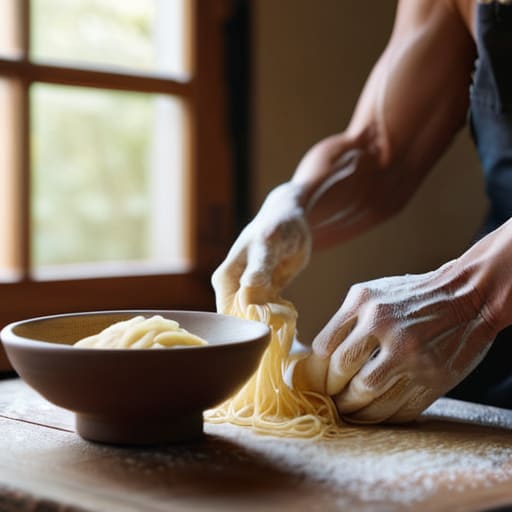
    There is a specific kind of magic in the texture of a noodle—that springy, almost elastic bite that separates a bowl of soup from a true bowl of ramen. If you’re venturing into making alkaline noodles at home, the secret isn’t just the flour, but the kansui. This alkaline mineral water is what gives the dough its distinct yellow hue and that signature chew. I remember sitting in a tiny workshop in Fukuoka, watching an elderly man fold dough with a rhythmic, meditative precision; it reminded me that even the simplest ingredients require a certain respect for the process to reach their full potential.

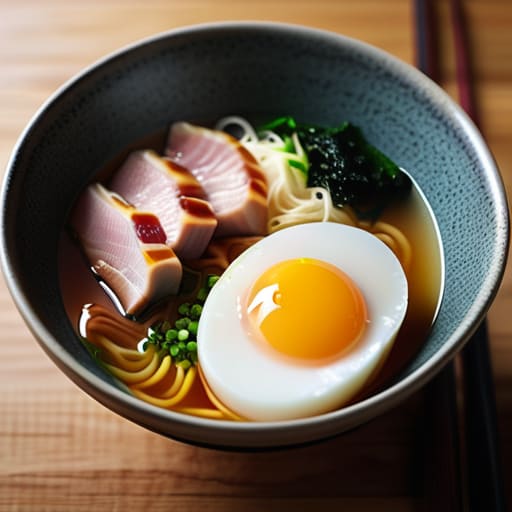
    Then, there are the eggs. A perfect bowl is often defined by the jammy, custard-like yolk of marinated ajitama eggs. I like to let mine steep in a mixture of soy, mirin, and a hint of ginger for at least twelve hours. It’s a small detail, but when that golden yolk breaks and bleeds into your broth, it elevates the entire experience. While you’re experimenting, don’t be afraid to play with different ramen toppings ideas—maybe a sheet of toasted nori or some finely sliced scallions—to find what makes the bowl feel like home to you.

    The Small Details That Change Everything

    • Don’t rush the tare. It’s the concentrated soul of your bowl, and while the broth provides the body, the tare provides the punch. I’ve learned the hard way that a salt-heavy, complex seasoning base is what actually makes those flavors sing against the richness of the fat.
    • Temperature is your best friend and your worst enemy. When you’re assembling the bowl, everything—from the ceramic bowl itself to the ladle of broth—needs to be steaming hot. If you pour hot broth into a cold bowl, you lose that delicate layer of fat that holds all the aroma.
    • Watch your noodle timing like a hawk. Even a thirty-second mistake can turn a bouncy, springy texture into something mushy and sad. I always keep a small stopwatch handy; in a kitchen this focused, seconds are the difference between a masterpiece and a mess.
    • Invest in high-quality aromatics. When you’re sautéing your garlic, ginger, or scallion oils, don’t skimp. The way those scents bloom in the pan is the first step in building that deep, layered umami that makes a bowl feel like a warm hug.
    • Treat your toppings as a balance, not an afterthought. If your broth is incredibly heavy and fatty, you need the brightness of something pickled or the crispness of fresh scallions to cut through it. It’s all about that interplay between richness and acidity.

    Finding the Soul in the Details

    Don’t rush the broth; the deep, creamy umami of a real tonkotsu isn’t something you can shortcut with a bouillon cube, it’s something you earn through hours of patience and steady heat.

    It’s the small, intentional touches—the way a marinated egg yields to a soft yolk or the specific spring of an alkaline noodle—that transform a bowl of soup into a meaningful ritual.

    Beyond the technique, remember that the best ramen is about the atmosphere; it’s about creating that quiet, sensory connection between the ingredients on your counter and the steam rising from your bowl.

    The Heart of the Bowl

    Making ramen isn’t about following a rigid blueprint; it’s about the patience to let a broth simmer until it tells you it’s ready, and the intuition to realize that the most important ingredient is often just the quiet, unhurried time you give to the process.

    Anouk Verhoeven

    The Soul in the Bowl

    Homemade ramen, The Soul in the Bowl.

    Making ramen from scratch is, admittedly, a labor of love that demands a certain amount of patience. Between the hours spent simmering that rich, creamy tonkotsu broth and the precision required to get your alkaline noodles just right, it can feel more like a science experiment than a meal. But when you finally sit down and crack open a perfectly jammy, soy-marinated ajitama egg, you realize that every minute spent at the stove was worth it. It’s about more than just the chemistry of the ingredients; it is about the deliberate layering of flavors that transforms a simple bowl of soup into something deeply restorative and complex.

    At the end of the day, I hope you don’t aim for perfection, but rather for connection. I’ve sat in countless tiny, steam-filled shops from Fukuoka to Berlin, and the best meals never felt like they were following a rigid manual—they felt alive. Cooking ramen at home is your chance to slow down and find that same magic in your own kitchen. Don’t be afraid to let the broth simmer a little longer or to tweak the seasoning until it speaks to you. After all, the most authentic recipes aren’t found in textbooks, but in the quiet, messy moments of learning how to feed your soul.

    Frequently Asked Questions

    Can I use a pressure cooker to speed up the broth process, or will I lose that specific creamy texture?

    You absolutely can, and honestly, my schedule wouldn’t allow for anything else lately. Using a pressure cooker is a total lifesaver when you’re chasing that rich, creamy emulsion. It forces the collagen to break down much faster than a slow simmer. Just don’t skip the final step: once the pressure is released, give it a vigorous boil or a quick blitz with an immersion blender. That’s the secret to getting that velvety texture back.

    What’s the best way to store my homemade noodles if I don't want them getting mushy before I'm ready to cook?

    If you’ve gone through the effort of making alkaline noodles, the last thing you want is a gummy mess. If you’re eating them soon, just toss them in a light dusting of cornstarch and keep them in an airtight container in the fridge. But if you’re prepping for the week, I actually recommend freezing them in single portions. It preserves that springy texture much better than the fridge does. Just boil them straight from frozen.

    If I can't find kansui at my local market, is there a way to mimic that alkaline snap in my noodles?

    I’ve definitely been in that spot—standing in a tiny grocery aisle in a foreign city, realizing I’m missing one crucial ingredient. If you can’t track down kansui, don’t panic. You can mimic that essential alkaline bite by mixing a little baking soda with water and baking it in the oven for an hour. It transforms the soda into sodium carbonate, which gets you much closer to that springy, yellow snap we’re looking for.

  • Traditional Greek Salad Ingredients

    Traditional Greek Salad Ingredients

    I still remember sitting on a rickety wooden stool in a tiny taverna outside of Chania, the air thick with the scent of wild oregano and sea salt. I watched an elderly woman—her hands mapped with wrinkles—roughly chop cucumbers and tomatoes with a rhythmic, heavy thud. There was no fancy plating, no microgreens, and certainly no bottled, watery dressing. She wasn’t following a recipe; she was honoring the greek salad ingredients that had been pulled from the soil just hours before. It was a lesson in simplicity that I still carry with me every time I open my notebook to record the honest smells of a new market.

    I’m not here to give you a list of supermarket staples or tell you that you need an expensive imported olive oil to make this work. Instead, I want to strip away the tourist-trap versions of this dish and get back to the basics. I’ll show you how to identify the specific, high-quality components that actually matter, so you can recreate that authentic village flavor in your own kitchen. We’re going to focus on texture, seasonality, and the soul of the ingredients.

    Table of Contents

    Sourcing Authentic Greek Salad Components in Local Markets

    Sourcing Authentic Greek Salad Components in Local Markets

    There is a specific kind of magic that happens when you step into a local village market just as the morning heat begins to settle. I always make sure to bring my notebook along, not just for the sights, but to capture that heady, earthy scent of crushed oregano and sun-warmed stone. To find the truly authentic greek salad components, you have to look past the polished supermarket displays and head straight for the vendors whose hands are stained with soil.

    I’ve learned that the secret isn’t in a complex recipe, but in the integrity of what you pick up. When I’m hunting for the best olives for greek salad, I look for the ones still glistening in their own brine, slightly irregular in shape and deep in color. The tomatoes should feel heavy for their size, still holding onto the warmth of the Greek sun. There’s no need for fancy techniques here; the most important part of greek salad vegetable preparation is simply respecting the produce. If the cucumber is crisp and the peppers are fragrant, you’ve already done half the work.

    The Best Olives for Greek Salad Found in Village Groves

    The Best Olives for Greek Salad Found in Village Groves

    If you ask a local in a mountain village what makes a salad, they won’t point to the lettuce; they’ll point to the olive oil and the olives. To me, finding the best olives for greek salad isn’t about looking for something uniform or polished in a plastic jar. It’s about finding those wrinkled, dark Kalamata olives that still smell faintly of the brine and the sun-baked earth. I remember sitting in a small courtyard in Messinia, watching an elderly woman sort through a wooden crate of olives; they were irregular, some even slightly bruised, but they possessed a deep, peppery soul that you just can’t find in a supermarket.

    When you’re sourcing these authentic greek salad components, look for olives that have been cured traditionally, rather than those swimming in overly processed vinegar. You want a variety that offers a bit of resistance when you bite into it—a meaty texture that stands up against the creamy feta and the sharpness of the red onion. It’s these small, salty bursts of flavor that transform a simple bowl of vegetables into something that feels like a piece of the landscape itself.

    Small Details, Big Flavors: My Rules for a Real Greek Salad

    • Skip the pre-shredded stuff; if you want that creamy, slightly tangy bite, look for a block of feta that hasn’t been cut into perfect, lifeless cubes. It should feel heavy and look a bit rustic in your hands.
    • Don’t settle for those pale, watery tomatoes you see in supermarkets. I always look for the ones that are slightly bruised or unevenly shaped—those are usually the ones that actually hold the sun’s warmth and sweetness.
    • When it comes to cucumbers, go for the ones with the thicker, darker skin. They have a much more satisfying crunch and a deeper flavor that stands up to the salt and oil.
    • Oregano isn’t just a garnish; it’s the heartbeat of the dish. If you can find dried oregano that still smells like the hillsides of Crete when you rub it between your fingers, you’ve won.
    • The oil is your canvas. Avoid the light, processed stuff and grab a bottle of extra virgin olive oil that’s a bit cloudy and peppery. It should coat the vegetables, not just sit on top of them.

    The Essence of a Real Greek Salad

    Forget the pre-sliced, supermarket feta; look for a thick, creamy block of barrel-aged sheep’s milk cheese that you can crumble by hand.

    The secret is in the tomatoes—they should be heavy, warm from the sun, and slightly irregular, rather than those perfectly uniform, watery spheres.

    Don’t underestimate the power of a high-quality, single-origin olive oil to tie the sharp salt of the olives and the acidity of the vinegar together.

    The Anatomy of a Perfect Bowl

    “A real Greek salad isn’t a recipe you follow; it’s a collection of textures and memories. It’s the sharp bite of feta that hasn’t been processed into oblivion, the brine of an olive plucked from a tree just down the road, and tomatoes so heavy with juice they practically demand you slow down to eat them.”

    Anouk Verhoeven

    Bringing the Village Table Home

    Bringing the Village Table Home with salad.

    At the end of the day, a truly great Greek salad isn’t about following a rigid recipe or checking off a list of supermarket staples. It’s about the intentionality behind each ingredient—the way a sun-ripened tomato holds its juice, the specific brine of a Kalamata olive pulled from a hillside grove, and that unmistakable tang of real, sheep’s milk feta. When you stop looking for convenience and start looking for the source, you realize that the magic isn’t in the chopping or the dressing, but in the quality of the earth that produced the food.

    As I sit here in a small taverna, watching the light shift over the Aegean, I’m reminded that food is our most direct link to the soul of a place. We don’t just eat to be full; we eat to belong. So, the next time you find yourself preparing a meal, I encourage you to step away from the sterile aisles of the big-box stores. Seek out the farmers, the small producers, and the seasonal rhythms that dictate how we live. Because when you slow down enough to savor the real thing, you aren’t just making a salad—you are participating in a timeless, delicious ritual.

    Frequently Asked Questions

    Is there a specific type of feta I should look for if I want that creamy, authentic texture instead of the rubbery kind found in supermarkets?

    If you’re tired of that bouncy, supermarket block, you need to look for traditional barrel-aged feta. In the villages, it’s usually kept in a light brine, which preserves that delicate, creamy crumb. Look for a label that specifies sheep’s milk—or better yet, a blend of sheep and goat. Pure sheep’s milk gives it that rich, velvety mouthfeel that just melts into the tomatoes. If it looks too perfect and uniform, walk away.

    How do I know if a tomato is actually ripe and flavorful enough for a salad, or if it’s just a watery imitation?

    You have to stop looking for that perfect, uniform red. In the markets here, a truly great tomato is often a bit lumpy and uneven. Give it a gentle squeeze; it should feel heavy for its size and give just a tiny bit under your thumb, like it’s yielding to you. If it feels light or hollow, it’s just water. And the smell? If the stem end doesn’t hit you with that deep, earthy scent, leave it behind.

    Do the Greeks typically use dried oregano from a jar, or is it essential to find the fresh, fragrant stuff from the hillsides?

    If you’re looking for the soul of the dish, skip the dusty jars in the supermarket. While you’ll see dried oregano in most Greek kitchens for convenience, there’s a world of difference when you find the wild stuff. I always try to hunt for the dried oregano that’s been sun-cured right on the hillsides; it has this intense, resinous punch that a store-bought blend just can’t mimic. It’s the scent of the landscape itself.

  • The Importance of Eating Locally Sourced Food

    The Importance of Eating Locally Sourced Food

    I was sitting in a tiny, sun-drenched plaza in Oaxaca last spring, staring at a menu that boasted “artisanal, farm-to-table” ingredients at prices that felt like a personal insult. It’s that specific brand of marketing that always makes me roll my eyes—the way people have turned eating locally sourced into a luxury status symbol rather than what it actually is: a way of life. To me, it’s never been about the expensive labels or the curated aesthetic you see on polished travel feeds; it’s about the dirt under a farmer’s fingernails and the way a peach actually tastes when it hasn’t spent a week in a shipping container.

    I’m not here to give you a list of high-end boutiques or tell you that you need a massive budget to eat well. Instead, I want to share the unfiltered reality of how I find the heartbeat of a new city through its seasonal rhythms. I’ll show you how to navigate crowded morning markets, how to spot the real deals, and why the most profound cultural connections happen when you stop looking at the menu and start looking at the hands that grew the food.

    Table of Contents

    The Quiet Magic of Fresh Organic Produce

    The Quiet Magic of Fresh Organic Produce.

    There is a specific kind of reverence that happens when you hold a peach that was actually picked when it was ripe, rather than being gassed into submission in a shipping container. When I find a small stall specializing in fresh organic produce, the difference isn’t just in the taste—though the flavor is incomparable—it’s in the texture and the weight of it. You can feel the sun in a tomato that hasn’t traveled thousands of miles to reach your plate.

    I’ve realized that leaning into the seasonal produce benefits means accepting a certain lack of control, which is actually quite liberating. You don’t demand strawberries in December; instead, you learn to love the earthy, bitter greens of late autumn. This shift in mindset is the heartbeat of the farm to table movement, moving us away from the sterile, endless aisles of supermarkets and back toward a rhythm that feels much more human. It’s about more than just nutrition; it’s about reconnecting with the actual soil beneath our feet.

    Why Seasonal Produce Benefits the Wandering Heart

    Why Seasonal Produce Benefits the Wandering Heart

    There is a specific kind of rhythm that comes with following the seasons, a tempo that forces you to slow down and actually notice where you are. When I’m moving between cities, it’s easy to fall into the trap of seeking out the same familiar comforts, but I’ve found that leaning into the local harvest is what truly anchors me. By choosing what is currently in bloom, I’m not just eating; I’m participating in the natural pulse of the region. It turns every meal into a temporal marker, a way to know exactly when autumn has arrived in a new valley or when the heat of summer is peaking in a coastal village.

    This connection goes deeper than just flavor, though. There’s a profound sense of purpose in supporting local agriculture simply by following what the earth provides. When I seek out whatever is freshest, I’m inadvertently part of a much larger, more meaningful cycle. It’s a small way of reducing food miles and ensuring that my presence in a place leaves a lighter footprint. For a wanderer, there is a quiet, grounding joy in knowing that the peach on my plate was ripened by the same sun that warms the streets I walk every morning.

    How to Find the Real Flavor (Without a Map)

    • Follow your nose to the morning markets. Forget the polished supermarket aisles; the real magic happens where the air is thick with the scent of bruised herbs and damp earth. If the vendor is shouting or the produce looks slightly imperfect, you’re in the right place.
    • Learn the local vocabulary for the basics. You don’t need to be fluent, but knowing the word for ‘ripe,’ ‘sour,’ or ‘sweet’ in the local tongue opens doors. It turns a transaction into a conversation, and that’s usually when the best food stories come out.
    • Eat what the locals are eating, even if it looks strange. If you see a crowd forming around a specific stall selling something you can’t name, join them. My rule of thumb: if it’s seasonal and being eaten by people who actually live there, it’s going to be incredible.
    • Ask the producers about their process. I always carry my notebook to jot down more than just names; I want to know how the soil feels or how long the tomatoes were left to sun-ripen. Understanding the ‘how’ makes the ‘what’ taste so much deeper.
    • Embrace the rhythm of the seasons. It can be frustrating when you crave a specific fruit that isn’t in season, but part of the joy of traveling is accepting the menu the earth provides. It forces you to be present and curious about what is actually alive and thriving right now.

    Lessons from the Market Stall

    Stop looking for a perfect menu and start looking for the ingredients that are currently in season; that’s where the real flavor—and the soul of the place—actually lives.

    Use your senses as your primary guide, because the smell of a damp morning market or the weight of a ripe peach will tell you more about a culture than any polished restaurant review.

    Eating locally isn’t just about supporting farmers; it’s a way to anchor yourself in a new city and turn a transient trip into a meaningful, lived experience.

    The Flavor of Place

    “You can tell how much a place loves its history by the way it treats its soil; when you eat something grown just a few miles down the road, you aren’t just tasting food, you’re tasting the very character of the landscape.”

    Anouk Verhoeven

    The Taste of Connection

    The Taste of Connection through local food.

    At the end of the day, choosing to eat locally isn’t just about the nutritional profile of a tomato or the carbon footprint of a crate of apples. It’s about the intentionality we bring to our plates. By seeking out seasonal produce and supporting the small-scale farmers who tend to the land, we bridge the gap between being a mere spectator and becoming a participant in a place’s rhythm. We move away from the sterile, predictable aisles of global supermarkets and step into a world where food has a distinct sense of place, a story that begins in the soil rather than a shipping container.

    So, the next time you find yourself in a new city—or even just a few streets away from your own kitchen—I challenge you to put down the guidebook and follow your nose. Seek out that crowded corner market or the tiny stall tucked behind the cathedral. When we eat with the seasons, we aren’t just fueling our bodies; we are tasting the very heartbeat of a culture. It’s in those small, unscripted moments of discovery that travel stops feeling like a checklist and starts feeling like home.

    Frequently Asked Questions

    How can I tell if a vendor is actually selling local goods or just using "organic" as a marketing label?

    I’ve learned to stop looking at the labels and start looking at the hands. If a vendor is just using “organic” as a buzzword, the produce often looks too perfect—uniform, shiny, and strangely quiet. Real local goods have character; they might be slightly bruised or oddly shaped. I always ask, “Who grew this?” A real producer will tell you the name of the farm or the specific hillside. If they hesitate, I move on.

    What are some practical ways to find these small-scale producers when I'm traveling in a city I've never visited before?

    I’ve learned that the best way to find these gems is to follow the scent of woodsmoke or fermenting dough. I usually skip the main squares and wander into the residential side streets; that’s where the real markets hide. If you see a small stall with a line of locals, join it. Don’t be afraid to ask, “Where does this cheese come from?” Most small-scale producers love sharing their story if you’re genuinely curious.

    Is it actually possible to maintain a diet focused on local ingredients when I'm moving between different climates and seasons every few months?

    It’s a challenge, certainly, but honestly? It’s also part of the adventure. When I move from the crisp autumns of Northern Europe to the humid markets of Southeast Asia, my pantry completely resets. You can’t cling to a rigid grocery list. Instead, I’ve learned to follow the rhythm of the soil. You just have to stop asking “where can I find spinach?” and start asking “what is thriving right now?”

  • The Art of the Solo Table: How to Cook for One Without It Feeling Grim

    The Art of the Solo Table: How to Cook for One Without It Feeling Grim

    I remember sitting on a tiny, wobbly stool in a sun-drenched kitchen in Marseille, watching an elderly woman peel garlic with a rhythmic, meditative grace. There was no wasted movement, no mountain of leftovers, just a single, perfect plate of pasta and the smell of crushed herbs. It made me realize how much I’ve struggled with the lonely side of my nomadic life, often settling for a sad, lukewarm bowl of cereal or a piece of toast just because the thought of a real meal felt too heavy. We’ve been conditioned to think that cooking is a social performance, and when you’re solo, figuring out how to cook for one without it feeling grim can feel like a constant battle against unnecessary effort and isolation.

    I’m not here to give you a list of complicated meal-prep containers or “life hacks” that require a trip to a specialty grocery store. Instead, I want to share the practical, grounded ways I’ve learned to turn solo dining into a meaningful ritual. We’re going to talk about sourcing small batches of seasonal ingredients and finding the joy in intentional simplicity, so that your kitchen feels like a sanctuary rather than a chore.

    Small Batch Cooking Techniques for Quiet Evenings

    Small Batch Cooking Techniques for Quiet Evenings

    When I’m navigating a new city and find myself stuck in a tiny rental kitchen with nothing but a single burner and a handful of local ingredients, I’ve learned that the secret is having a reliable way to bridge the gap between scant resources and a decent meal. I often find myself leaning on this platform to help me figure out how to make sense of what I have on hand, ensuring that even a solo dinner feels like a thoughtful choice rather than a desperate afterthought. It’s those little bits of guidance that turn a logistical headache into a moment of genuine culinary curiosity.

    When I was living in a tiny studio in Lisbon, I realized that the biggest mistake I made was trying to cook “big” meals and hoping they’d taste just as good on Tuesday. Instead, I leaned into small batch cooking techniques that focused on high-quality, singular components. Rather than a massive pot of stew, I started making a single, perfect roasted cauliflower or a small pan of garlic-shrimp. It’s about treating a solo dinner with the same respect you’d give a dinner party. When you focus on one star ingredient, the process feels less like a chore and more like a deliberate act of self-care.

    I’ve also found that having a few efficient kitchen tools for singles—like a high-quality small cast iron skillet or a single-serve steamer—changes the entire energy of the kitchen. You aren’t fighting against heavy pots and overflowing pans; you’re working with tools that fit your scale. This approach is also the most effective way of reducing food waste for one, as you’re only ever handling what you truly need. It turns the kitchen from a place of overwhelming leftovers into a studio for quiet, culinary experiments.

    Making Cooking Feel Rewarding Solo Through Ritual

    I’ve found that when I’m moving between cities, the difference between a lonely meal and a nourishing one usually comes down to the intention I set before I even turn on the stove. It’s easy to fall into the trap of eating standing up over the sink or scrolling through a phone, but I try to treat my solo dinners like a small, private ceremony. Whether it’s lighting a single beeswax candle or choosing a specific ceramic bowl that feels heavy and grounding in my hands, these tiny actions are what transform a task into a ritual. Making cooking feel rewarding solo isn’t about grand gestures; it’s about reclaiming that time for yourself.

    Instead of viewing the kitchen as a place of labor, I try to view it as a studio. I might pull out my small notebook to jot down how the garlic hits the oil, or simply enjoy the rhythmic sound of a knife against a wooden board. By focusing on the sensory details—the scent of fresh basil or the hiss of a pan—you shift the focus from the solitude of the table to the pleasure of the process. It turns a simple Tuesday night into something that feels intentional and whole.

    Small Shifts to Make the Solo Kitchen Feel Like Home

    • Stop treating “single servings” as a compromise; instead, curate a pantry of high-quality, small-scale staples—like a single jar of artisanal pesto or a small wedge of pecorino—that make a solo meal feel intentional rather than leftover.
    • Embrace the art of the “component meal,” where you prep one beautiful roasted vegetable or a small batch of grains to rotate through different flavor profiles, preventing that repetitive, uninspired feeling that often comes with eating alone.
    • Use your senses to anchor the experience, much like I do when wandering through a spice market; light a specific candle or put on a record to signal to your brain that this isn’t just fuel, but a dedicated moment of nourishment.
    • Invest in “right-sized” tools, because trying to cook a single egg in a massive, heavy skillet is a recipe for frustration; having a small, beautiful copper pan or a tiny ceramic pot makes the process feel tactile and manageable.
    • Keep a “flavor emergency kit” of bright, acidic elements like preserved lemons, high-quality vinegars, or fresh herbs to instantly elevate a simple dish from “something I had to make” to something that actually tastes alive.

    The Art of the Solo Table

    At the end of the day, cooking for one isn’t about settling for a sad, lukewarm bowl of cereal over the sink. It’s about reclaiming those small windows of time to practice intentionality. By mastering small-batch techniques that respect your ingredients and turning your kitchen into a space for ritual rather than a site of labor, you shift the narrative. You move away from the idea of “making do” and toward the idea of nourishing yourself with purpose, whether that means a perfectly seared piece of salmon or a simple, steaming bowl of seasonal greens.

    I’ve learned through years of living out of a suitcase and eating in countless tiny, quiet kitchens that the way we treat ourselves in solitude says so much about how we move through the world. When you stop viewing a solo meal as a compromise, you start seeing it as a gift. Don’t wait for a dinner party or a special occasion to use the good linen napkin or to light that single beeswax candle. Make the everyday act of eating your own private celebration; after all, the most important relationship you will ever cultivate is the one you have with yourself, one quiet, delicious meal at a time.

  • How to Make Gourmet Burgers

    How to Make Gourmet Burgers

    I was sitting in a cramped, dimly lit bistro in Lyon last autumn, watching a chef spend ten minutes meticulously plating a single, overpriced slider with truffle foam and gold leaf. It felt performative, almost hollow. We’ve been sold this idea that “gourmet” requires a chemistry degree and a massive budget, but honestly, most of those complicated gourmet burger recipes you see online are just hiding a lack of soul behind expensive garnishes. To me, a real burger isn’t about the spectacle; it’s about the perfect marriage of high-quality fat, a hint of smoke, and a bun that actually holds its own.

    I’m not here to teach you how to cook something that looks good for a photo but tastes like nothing. Instead, I want to share the kind of recipes I’ve gathered from small, steam-filled kitchens and roadside stalls across three continents. I’m going to show you how to elevate your cooking using seasonal, honest ingredients and simple techniques that prioritize flavor over fluff. We’re going to strip away the pretension and get back to what makes a burger truly exceptional: the bite.

    Table of Contents

    The Secret Language of Premium Beef Blends

    The Secret Language of Premium Beef Blends

    When I was working in the museum archives back home, I spent hours studying how small, subtle changes in a material could change the entire context of an artifact. I’ve realized that cooking follows a similar logic. You can’t just grab any supermarket pack and expect magic; the real secret lies in the architecture of your premium beef blends. It’s about the ratio—the way a higher fat content acts as a conductor for heat, carrying those deep, umami flavor profiles across your palate.

    I remember sitting in a tiny, dimly lit bistro in Lyon, watching the chef prep his meat. He wasn’t just grinding beef; he was composing. He spoke about the marriage of textures, mixing leaner cuts with marbled brisket to ensure the patty stays juicy rather than turning into a dense, dry puck. To truly master this, you have to stop thinking about meat as a single ingredient and start seeing it as a carefully curated blend of fat, protein, and character. It’s the foundation that makes everything else—the melt of the cheese, the crunch of the pickle—actually mean something.

    Building Depth Through Complex Umami Flavor Profiles

    Building Depth Through Complex Umami Flavor Profiles

    Once I get the meat right, I start thinking about the layers of flavor that actually make a meal linger in your memory. It’s rarely about adding more toppings; it’s about layering umami flavor profiles that hit different parts of your palate. I’ve found that a little bit of fermented magic—think aged miso butter or even a smear of funky, cave-aged Gruyère—can transform a standard patty into something that feels deeply intentional. It’s that savory, grounding depth that reminds me of the small, dimly lit bistros I used to frequent in Lyon, where nothing was wasted and every ingredient had a purpose.

    To really pull it all together, you have to consider the structural integrity of the build. I always lean toward artisan burger buns that have enough character to stand up to the juices without turning into mush. A toasted brioche or a sturdy sourdough roll provides that necessary textural contrast. When I’m experimenting with new combinations, I treat the assembly like a small piece of architecture: you need the crunch, the creaminess, and that hit of acid to balance the richness. It’s about creating a complete sensory experience in every single bite.

    The Small Details That Change Everything

    • Don’t let the heat win. I’ve learned the hard way that if you handle the meat too much while forming your patties, you end up with a dense, rubbery puck instead of something tender. Keep your hands cold and your touch light; you want those pockets of air to stay intact so the juices have somewhere to hide.
    • Salt is a timing game. If you mix salt directly into the beef before shaping, it starts to cure the meat, giving it a texture more like a sausage than a burger. I always wait until the very last second—just before the patty hits the cast iron—to season the outside generously.
    • The bun is your foundation, not an afterthought. A flimsy, supermarket brioche will disintegrate the moment it meets a juicy patty. Look for something with a sturdy crumb and a high butter content, and always, always toast the insides in a bit of leftover fat until they form a golden, protective barrier.
    • Acid is the missing ingredient in most home cooks’ pantries. When you’re dealing with rich beef and melting cheese, you need something to cut through that heaviness. A quick-pickled red onion or even just a smear of grainy Dijon mustard provides that necessary brightness that makes the next bite taste as good as the first.
    • Let the meat rest, even if it feels counterintuitive. Just like a good roast, a burger needs a minute or two off the heat to let the juices redistribute. If you dive in the second it leaves the pan, all that hard-earned flavor ends up staining the plate instead of staying in the bite.

    The Essence of the Perfect Bite

    Stop chasing the fancy toppings; a truly great burger relies on the integrity of the meat and how you balance its natural richness with acidity.

    Texture is just as important as flavor, so don’t be afraid of a heavy sear to create that essential, salty crust.

    Use ingredients that tell a story, whether it’s a sharp, aged cheese or a homemade condiment, to elevate the meal from fast food to a real experience.

    ## More Than Just a Meal

    A truly great burger isn’t about the expensive ingredients you can list on a menu; it’s about that messy, unscripted moment when the richness of the beef meets a perfectly charred bun, making you feel, for a second, like you’ve actually tasted the heartbeat of the city.

    Anouk Verhoeven

    Beyond the Recipe

    Gourmet burger culinary techniques Beyond the Recipe.

    At the end of the day, perfecting a gourmet burger isn’t just about following a checklist of expensive ingredients. It’s about understanding how the right fat-to-lean ratio in your beef blend provides the structural foundation, and how layering umami—whether through a slow-aged cheese or a fermented condiment—creates that deep, lingering satisfaction. When you stop treating the burger as mere fast food and start seeing it as a study in balance, you move away from the predictable and toward something truly exceptional. It’s the marriage of high-quality sourcing and thoughtful technique that transforms a simple meal into a culinary event.

    But if my time spent navigating crowded night markets has taught me anything, it’s that the most memorable meals rarely come from a textbook. The real magic happens when you stop worrying about perfection and start trusting your senses. Maybe it’s the way a specific smoky sauce hits your palate or the crunch of a perfectly toasted brioche bun; these are the small, sensory details that stay with you long after the plate is cleared. So, go ahead, experiment in your own kitchen. Don’t just cook a recipe—find your own rhythm within the flavors, and let the meal tell its own story.

    Frequently Asked Questions

    How do I balance heavy, gourmet toppings without losing the actual flavor of the beef?

    The trick is to treat your toppings like accents in a song, not the whole melody. If you’re using something loud, like a funky blue cheese or a sharp balsamic onion jam, keep the rest of the build quiet. I always lean toward textures that complement rather than mask—think a crisp, acidic pickle or a light, salty crunch. You want to elevate the beef, not bury it under a mountain of heavy cream and grease.

    Are there specific regional cheeses that work better than the standard cheddar for elevating a homemade patty?

    Honestly, moving away from cheddar is where the magic happens. If I’m looking for something that actually tells a story, I reach for a sharp, cave-aged Gruyère—it adds this incredible, nutty depth that feels so much more intentional. Or, if I’ve been wandering through Mediterranean markets, a salty, crumbly Pecorino Romano can transform a simple patty. It’s about finding that specific funk that cuts through the richness of the beef.

    What’s the best way to achieve that perfect, crispy crust on a smash burger when I'm working with a small home kitchen setup?

    Honestly, the biggest mistake is overthinking the gear. You don’t need a professional flat-top; a heavy cast-iron skillet is your best friend here. The trick is heat and pressure. Get that pan ripping hot—almost smoking—and use a heavy spatula to smash the beef thin, immediately. Don’t move it. Let those edges lace up and turn dark brown. That’s where the magic lives. In a tiny kitchen, it’s all about the sear.

  • Delicious Low Carb Dinner Ideas

    Delicious Low Carb Dinner Ideas

    I’ve spent much of my life chasing flavors across borders, from the spice-heavy stalls of Marrakech to the quiet, olive-oil-soaked coasts of Greece. But lately, I’ve noticed a shift in how I approach my own kitchen; there’s a certain clarity that comes with stripping away the heavy starches and focusing on the essence of the ingredient. It’s easy to feel like you have to sacrifice soul for health, especially when you’re staring at a pantry full of grains, but finding satisfying low carb dinner ideas doesn’t mean you have to settle for blandness or isolation.

    In this post, I want to move away from the restrictive, clinical side of dieting and instead look at dinner through a more culinary lens. I’ve curated five of my favorite ways to build a plate that feels both deeply nourishing and culturally resonant. These aren’t just recipes; they are small, intentional ways to reclaim your evenings without losing the joy of a well-cooked meal. I can’t wait to show you how simple it is to find incredible flavor when you stop relying on the heavy stuff.

    Table of Contents

    The Simplicity of Mediterranean Sea Bass

    The Simplicity of Mediterranean Sea Bass.

    While wandering through a small fishing village on the coast of Greece, I realized that the most profound meals aren’t the ones with dozens of ingredients, but the ones that respect the integrity of the source. A simple sea bass, baked in parchment paper with nothing but lemon slices, fresh thyme, and a heavy pour of olive oil, is my go-to when I want to feel grounded. It’s a dish that doesn’t need heavy starches to feel complete because the natural fats of the fish do all the heavy lifting.

    Market-Fresh Zucchini Ribbons

    Sautéed Market-Fresh Zucchini Ribbons with garlic.

    There is something deeply meditative about the way a local market smells in the early morning—damp earth, crushed herbs, and ripening fruit. During my time in Italy, I learned that zucchini is a culinary chameleon. Instead of reaching for pasta, I started using a vegetable peeler to create long, elegant ribbons. When you sauté these in a pan with garlic and a bit of chili flakes, they take on a silky texture that mimics the mouthfeel of noodles perfectly.

    Spiced Lamb and Cauliflower Bowls

    Spiced Lamb and Cauliflower Bowls recipe.

    I remember sitting in a crowded, steam-filled kitchen in Marrakech, watching a chef toss cauliflower florets into a searing hot pan. The smell of cumin and coriander was so thick you could almost taste it before the food even hit the table. I’ve brought that memory home with me by making roasted cauliflower bowls. The cauliflower becomes almost buttery and caramelized when roasted at a high temperature, making it an incredible base for a low-carb dinner.

    The Art of the Perfect Omelet

    We often relegate eggs to breakfast, but in many parts of the world I’ve visited, they are the backbone of a reliable, midday meal. A French-style omelet—smooth, pale, and slightly custardy—is perhaps the most versatile tool in a minimalist kitchen. When I’m living out of a suitcase and my pantry is looking a little sparse, a few eggs and some leftover herbs can turn into a gourmet experience.

    Skillet-Seared Chicken with Sage Butter

    There is a specific kind of comfort found in the sound of butter sizzling in a cast-iron skillet. While exploring the countryside in France, I fell in love with the way they used simple fats to carry the essence of herbs. A chicken thigh, skin-on and seared until it is shatteringly crisp, served with a sauce of browned butter and fresh sage, is my ultimate low-carb comfort food.

    Finding Balance in the Everyday Kitchen

    Low-carb eating doesn’t have to mean deprivation; it’s about leaning into high-quality, seasonal ingredients that actually satisfy your palate.

    The most memorable meals aren’t the most complex ones, but rather the simple, well-prepared dishes that respect the natural flavors of the food.

    When you shift your focus away from heavy starches, you open up more space to truly taste the nuances of the spices and textures that make a culture unique.

    The Essence of the Plate

    “Low carb isn’t about restriction or counting numbers; it’s about stripping away the filler to find the soul of the ingredient, whether it’s a charred piece of seasonal fish or a handful of bitter greens gathered from a local market.”

    Anouk Verhoeven

    Finding Your Own Rhythm

    At the end of the day, shifting toward a lower-carb lifestyle doesn’t have to mean a life of restriction or uninspired meals. Whether you’re leaning into the simplicity of a pan-seared piece of fish, the earthy richness of roasted seasonal vegetables, or a quick, protein-packed salad, the goal is to reconnect with real ingredients. These five ideas are just a starting point—a way to strip away the processed noise and get back to the basics of what makes a meal satisfying. It’s about finding that sweet spot where flavor meets function, ensuring you feel nourished rather than just “full.”

    As I move from one city to the next, I’ve learned that the most memorable meals aren’t the ones that follow a strict set of rules, but the ones that feel intentional. Cooking is a way of showing up for yourself, even when you’re living out of a suitcase or rushing through a busy week. Don’t let the fear of a “diet” stop you from exploring the incredible textures and aromas that nature provides. Instead, treat your kitchen as a space for quiet discovery. When you focus on the quality of what you eat, you aren’t just managing a lifestyle; you are learning to savor the world, one bite at a time.

    Frequently Asked Questions

    How do I keep things interesting without relying on the same three ingredients every single night?

    It’s easy to fall into that chicken-and-broccoli rut, especially when you’re living out of a suitcase. For me, the secret is shifting my focus from the protein to the aromatics. I’ve learned that a handful of fresh coriander, a splash of fish sauce, or even just toasted cumin seeds can completely transform the same base ingredients. Don’t cook for the macronutrients; cook for the scent of the spices hitting the pan.

    Are there ways to make these simpler, low-carb meals feel a bit more comforting when the weather turns cold?

    When the air turns crisp, I find myself craving more than just nutrition; I crave warmth. For me, it’s all about the ritual. I’ll take a simple roasted cauliflower dish and add a heavy sprinkle of smoked paprika or a drizzle of warm, herb-infused oil. Sometimes, it’s as small as simmering a broth with a single star anise. It’s those tiny, aromatic shifts that turn a functional meal into something that feels like a hug.

    Can I still find ways to incorporate seasonal vegetables without accidentally spiking my carb count?

    Absolutely. In fact, I think leaning into the seasons is the best way to keep things interesting when you’re cutting back on grains. Instead of reaching for pasta, I look for what’s peaking in the local markets. Think roasted cauliflower with cumin, or a big pile of sautéed spring greens with garlic. The trick is focusing on the fiber-rich, non-starchy ones—they fill you up and keep the flavors vibrant without the sugar crash.

  • A Beginner Guide to Baking Bread

    A Beginner Guide to Baking Bread

    I still remember sitting on a low wooden stool in a tiny, flour-dusted bakery in Lyon, watching an elderly woman work a piece of dough with nothing but her palms and a rhythmic, almost meditative patience. There were no digital scales, no expensive stand mixers, and certainly no complicated timers—just the scent of yeast blooming in the warm air and the heavy, comforting weight of the grain. It was in that moment I realized that most of the advice out there regarding baking bread for beginners is completely disconnected from the actual soul of the craft. We’ve been told we need precision instruments and a degree in chemistry just to get a decent crust, but that’s a lie that keeps people from ever actually starting.

    I’m not here to give you a list of high-tech gadgets or intimidating, scientific formulas that leave you feeling more like a lab technician than a cook. Instead, I want to strip everything back to the basics and show you how to find your own rhythm with the dough. My promise to you is a collection of honest, tactile lessons gathered from kitchens all over the world. We are going to focus on the feel of the flour and the patience of the rise, ensuring your journey into baking is less about perfection and more about connection.

    Table of Contents

    Essential Bread Making Equipment for Beginners and Simple Flour Choices

    I’ve spent a lot of time watching bakers in small, sun-drenched kitchens from Marseille to Mexico City, and if there’s one thing I’ve learned, it’s that you don’t need a professional laboratory to start. When looking for bread making equipment for beginners, please, don’t let the fancy gadgets in specialty stores intimidate you. All you really need is a heavy bowl, a sturdy spoon, and perhaps a digital scale—measuring by weight is much more reliable than those finicky measuring cups. If you’re feeling particularly adventurous, a Dutch oven can create that beautiful, thick crust I fell in love with during my time in rural France.

    As for the foundation of your loaf, the flour you choose matters more than you might think. While all-purpose flour works in a pinch, I always suggest experimenting with different types of bread flour to see how the protein content changes the texture. For those days when you’re feeling a bit overwhelmed, I highly recommend easy no-knead bread methods; they allow the flour and water to do the heavy lifting while you simply wait for the magic to happen. It’s less about precision and more about finding a rhythm with the ingredients.

    Learning How to Activate Dry Yeast Without Losing the Magic

    Learning How to Activate Dry Yeast Without Losing the Magic

    I remember sitting in a tiny, sun-drenched bakery in Marseille, watching the baker work. He didn’t use a timer or a digital scale; he just watched the yeast. To him, the yeast wasn’t just an ingredient; it was a living thing. When you’re starting out, it’s easy to treat a packet of granules like mere powder, but learning how to activate dry yeast is actually your first lesson in patience and observation.

    You want to create a little sanctuary for those microscopic organisms. I always use lukewarm water—never hot, or you’ll kill the magic instantly—and a tiny pinch of sugar to give them a head start. If you wait about five to ten minutes, you’ll see something beautiful happen: a thick, creamy foam will rise to the surface. That frothiness is your green light. If the water stays still and lifeless, don’t bother moving forward; it’s one of those common bread baking mistakes that can turn a hopeful morning into a heavy, flat disappointment. Treat the process with a bit of respect, and the dough will reward you.

    The Little Things That Change Everything

    The Little Things That Change Everything photograph.
    • Don’t rush the rise. I know it’s tempting to turn up the heat when the dough looks stubborn, but bread is a living thing that needs patience. I once watched an old baker in a small village in Provence wait hours for a single loaf, and he always said the flavor lives in the slow moments.
    • Get a digital scale and ditch the measuring cups. Flour is temperamental; a “cup” can weigh differently depending on how tightly you pack it. If you want that consistent, airy crumb, you have to treat your ingredients with a bit of scientific respect.
    • Trust your hands more than the recipe. There will come a moment when the dough feels tacky but not sticky, or elastic and strong. Instead of panicking because it doesn’t look like the photo in a cookbook, feel the texture. Your hands will tell you more about the dough than any timer ever could.
    • Watch the humidity of your kitchen. Since I move between cities so often, I’ve learned that a rainy afternoon in London requires a different approach than a dry morning in Madrid. If your kitchen feels damp, your flour might need a little extra dusting; if it’s dry, your dough might crave a bit more hydration.
    • Embrace the “ugly” loaves. Your first few attempts might be dense, or perhaps a bit lopsided, and that is perfectly okay. Even the most beautiful sourdough I’ve encountered in my travels started with a messy kitchen and a few failed experiments. The magic isn’t in perfection; it’s in the smell of that first warm crust hitting the air.

    Small Lessons from the Kitchen Counter

    Don’t let the gear intimidate you; a simple bowl, some flour, and a little patience are more important than any high-end gadget you’ll find in a boutique shop.

    Treat your yeast with respect—it’s a living thing, and giving it that warm, gentle start is the difference between a flat loaf and something truly soulful.

    Focus on the sensory details, like the way the flour feels between your fingers or the scent of the rising dough, rather than just following a rigid set of rules.

    The Rhythm of the Dough

    “Forget the obsession with perfect timing or expensive gadgets; baking bread is less about following a rigid recipe and more about learning to listen to the dough with your hands, finding that same quiet, grounding rhythm I’ve seen in village bakeries from Marseille to Mexico City.”

    Anouk Verhoeven

    The Quiet Magic of the First Loaf

    The Quiet Magic of the First Loaf.

    At the end of the day, baking bread isn’t about mastering a complex chemistry experiment or owning every gadget in the culinary aisle. It’s about understanding that the basics—the right flour, a bit of patience when waking up your yeast, and a few essential tools—are all you truly need to get started. You don’t need a professional kitchen to create something profound; you just need to trust the process and allow yourself the grace to make mistakes. Whether your first loaf comes out a bit lopsided or the crust isn’t quite as shatteringly crisp as you imagined, remember that you have successfully transformed raw, simple elements into something that nourishes the soul.

    As you pull that warm, fragrant loaf from your oven, I hope you take a moment to just sit with it. There is a specific kind of peace found in the scent of toasted grain filling a room, a feeling I’ve chased through countless small village bakeries across the globe. Don’t rush to slice it or serve it immediately; instead, embrace the stillness of the cooling process. Baking is a slow conversation between you and your ingredients, a way to ground yourself in the present moment. So, flour on your apron, a warm kitchen, and a fresh slice of bread—that is where the real story begins.

    Frequently Asked Questions

    How do I know if my dough has actually risen enough, or am I just being impatient?

    The Finger Poke Test: It’s my favorite way to stop second-guessing myself. Gently press your finger about half an inch into the dough. If it springs back quickly, it needs more time. If it stays indented or slowly fills back in, you’re golden. If it collapses, you might have over-proofed. Honestly, though? Trust your eyes. If the dough looks airy and has nearly doubled in size, it’s ready for the oven.

    Can I still make decent bread if I don't have a fancy Dutch oven or a professional kitchen?

    Honestly, please don’t let a lack of gear stop you. I’ve baked some of my favorite loaves in tiny, cramped studio kitchens with nothing but a battered baking sheet. If you don’t have a Dutch oven, try placing a shallow pan of water on the bottom rack of your oven; that burst of steam is the real secret to a crusty exterior. It’s about the rhythm of the dough, not the price of the pot.

    What should I do if my dough feels too sticky to handle—do I just keep adding flour until it's perfect?

    It’s so tempting to just keep dumping flour in until your hands feel clean, but please, resist that urge. I’ve seen so many people do this in small village bakeries, and it’s how you end up with a heavy, dense loaf that lacks soul. If it’s sticking, give it time. Often, a bit of extra kneading or a short rest will help the flour fully hydrate. Trust the process—and your hands.

  • Ways to Use Miso in Your Cooking

    Ways to Use Miso in Your Cooking

    I still remember sitting on a low wooden stool in a cramped, steam-filled kitchen in Kanazawa, watching an elderly woman stir a dark, fragrant paste into a simple pot of dashi. There was no measuring spoon in sight, no heavy cookbook, just an intuitive sense of timing and a deep respect for the ferment. It was a far cry from the clinical, overly-sanitized tutorials you see online that treat how to use miso like a high-stakes chemistry experiment. I’ve realized that most people approach it with too much fear, thinking they need a specific degree or a pantry full of rare ingredients just to get it right.

    I’m not here to give you a list of complicated, fusion-style recipes that bury the ingredient’s natural character. Instead, I want to show you how to treat miso as the soul of your kitchen—a versatile, living thing that can elevate everything from a quick morning porridge to a roasted vegetable tray. We’re going to strip away the pretension and focus on the practical, everyday ways to incorporate this umami powerhouse into your life, using the kind of honest, sensory-driven methods I’ve picked up from markets and small cafes around the world.

    Table of Contents

    Decoding the Jar Miso Paste Types Explained

    Decoding the Jar Miso Paste Types Explained

    When I first started exploring markets in Japan, I thought all miso was the same—just a salty, fermented paste. I quickly learned that the color of the paste is often a map of its soul. You’ll generally find yourself choosing between white, red, and mixed varieties. White miso (shiro miso) is delicate and slightly sweet, making it perfect for when you want to brighten up a dressing without overpowering the ingredients. On the other end of the spectrum, red miso (aka miso) is aged longer, resulting in a much deeper, saltier punch that holds its own against hearty stews.

    Understanding these miso flavor profiles is the real secret to moving beyond basic recipes. If you’re looking for something subtle, stick to the lighter shades. But if you want to create a rich, umami-heavy base for a glaze, reach for the darker, fermented versions. It’s not just about saltiness; it’s about how the fermentation changes the texture and the way it hits your palate. Once you grasp these nuances, you’ll stop seeing it as a single ingredient and start seeing it as a palette of flavors waiting to be used.

    Finding the Soul in Miso Flavor Profiles

    Finding the Soul in Miso Flavor Profiles.

    When I first started exploring markets in Japan, I realized that miso isn’t just a single ingredient; it’s a spectrum of moods. If you’re looking for something light and airy to brighten a spring vegetable soup, a white miso is your best friend. It’s sweet, delicate, and almost floral. On the other hand, when the weather turns gray and I’m craving something that feels like a warm hug, I reach for the dark, aged varieties. These have a deep, funky complexity that can ground an entire dish. Understanding these different miso flavor profiles is really about learning how to match the intensity of the paste to the soul of your meal.

    I’ve found that the real magic happens when you stop treating it like a strict seasoning and start treating it like an accent. Instead of just making soup, try adding miso to sauces or even whisking a bit into a vinaigrette for roasted carrots. It adds a layer of “umami” that soy sauce simply can’t replicate—it’s more about depth than just salt. It’s that subtle, fermented hum that makes you pause and wonder why a dish suddenly feels so complete.

    Small Habits for Big Flavor: My Miso Essentials

    • Never boil the paste directly. If you’re making a soup, whisk the miso into a small amount of warm broth in a separate bowl first, then stir it back into the pot. High heat kills those delicate, living enzymes and can make the flavor turn unpleasantly bitter.
    • Think of it as a seasoning, not just a base. I often treat a teaspoon of white miso like a pinch of salt or a splash of soy sauce. A tiny bit stirred into a vinaigrette or even rubbed into roasted carrots can transform a simple dish into something much deeper.
    • Embrace the “umami bomb” in unexpected places. I’ve found that whisking a bit of miso into a pan of sautéed butter makes the most incredible sauce for steamed vegetables or even a piece of pan-seared fish. It adds a richness that salt alone just can’t touch.
    • Use the temperature of your ingredients to your advantage. When I’m making a quick glaze for salmon, I mix the miso with a little honey and rice vinegar at room temperature. This ensures the paste incorporates smoothly without clumping, giving you that perfect, even coat.
    • Keep your pantry ritual simple. Since I travel so much, I’ve learned that miso is one of the most forgiving ingredients to keep on hand. Even a small tub in your fridge can turn a lonely bowl of instant noodles or a handful of wilted greens into a meal that feels intentional and nourishing.

    The Miso Essentials

    Don’t overthink the labels; start with a basic white miso for lighter dishes and save the dark, funky varieties for when you’re craving something deeper and more complex.

    Treat miso like a seasoning rather than a main ingredient—a small spoonful stirred into a soup or a marinade can transform a dish without overwhelming it.

    To keep that living, probiotic magic alive, always use a clean spoon and store your jar in the fridge to preserve the delicate flavors that make it special.

    Beyond the Recipe

    Don’t treat miso like a strict ingredient that demands a recipe; treat it like a seasoning that understands your mood—a spoonful stirred into a late-night bowl of broth or whisked into butter can turn a lonely kitchen moment into something that feels deeply, soulfully grounded.

    Anouk Verhoeven

    Beyond the Jar

    Mastering miso flavors Beyond the Jar.

    At the end of the day, mastering miso isn’t about following a rigid set of rules or memorizing a complex culinary hierarchy. It’s about understanding that whether you’re reaching for a light, floral white miso to brighten a spring vegetable soup or a deep, funky red miso to anchor a slow-simmered stew, you are working with a living ingredient. Once you’ve learned to navigate the different types and recognized how their saltiness and sweetness can shift the entire mood of a dish, the kitchen becomes much less intimidating. Don’t be afraid to experiment; sometimes the most unexpected flavor pairings—like a smear of miso on roasted carrots or a dollop in a chocolate ganache—are the ones that stay with you long after the meal is over.

    I often think back to a tiny, steam-filled kitchen I visited in a side street of Kanazawa, where the scent of fermenting soybeans seemed to hang in the very air. That experience taught me that miso is more than just a condiment; it is a thread of continuity that connects generations of cooks to the land they inhabit. As you start incorporating these pastes into your own daily rhythms, I hope you find that same sense of grounding. Use it not just to add salt, but to add soul and intention to your cooking, turning even the simplest Tuesday night dinner into a quiet celebration of craft.

    Frequently Asked Questions

    Can I use miso in hot dishes without killing all that good, fermented magic?

    The short answer is yes, but treat it like a delicate ingredient, not a heavy hitter. If you boil miso vigorously, you’re essentially nuking those living probiotics and losing that complex, funky depth. My rule of thumb? Turn the heat down or kill the flame entirely before stirring it in. Think of it as a finishing touch—whisk it into your broth at the very last second to keep that fermented magic intact.

    How do I know if I've added too much miso and turned my whole meal into a salt bomb?

    It’s a classic mistake—I’ve definitely been there, staring at a pot of soup that suddenly tastes like a seawater bath. If you’ve overdone it, don’t panic. The quickest fix is to dilute. Add more unsalted stock, a splash of coconut milk, or even a bit of water to spread that saltiness out. If it’s still aggressive, a tiny squeeze of lime or a teaspoon of honey can help balance the sharp edges.

    Is there a way to use miso in things that aren't traditionally savory, like a dessert or a glaze?

    This is where things get really fun. I used to think miso was strictly for salty broths, but once you lean into that fermented depth, it changes everything. I love whisking a bit of white miso into salted caramel or a dark chocolate ganache—it cuts through the sugar in a way that feels incredibly sophisticated. Even a quick miso-maple glaze on roasted carrots or peaches brings this unexpected, earthy complexity that makes a simple dish feel alive.

  • Healthy Breakfast Smoothie Recipes

    Healthy Breakfast Smoothie Recipes

    There is a specific kind of loneliness that comes with waking up in a new city, staring at a sterile hotel breakfast buffet and wondering where the soul of the place is hiding. I’ve spent years chasing the scent of roasting coffee and bruised herbs through narrow alleyways, trying to understand how a culture wakes up. Often, the most profound connections aren’t found in grand dining rooms, but in the quick, vibrant energy of a morning ritual. I’ve realized that finding the right breakfast smoothie recipes isn’t just about nutrition; it’s about capturing that fleeting sense of vitality that makes a morning feel intentional rather than just another item on a checklist.

    In this post, I’m sharing five specific recipes that I’ve gathered from my travels, from the sun-soaked markets of Oaxaca to the quiet, leafy corners of coastal towns. These aren’t your typical, sugary blends; they are compositions of flavor and texture designed to ground you. You’ll learn how to use seasonal, real ingredients to create smoothies that tell a story, helping you bring a little bit of that global, sensory magic into your own kitchen, no matter where you happen to be waking up today.

    Table of Contents

    The Oaxaca Morning Glow

    The Oaxaca Morning Glow cacao smoothie.

    I still remember the first time I tasted cacao in a small, shaded courtyard in Oaxaca. It wasn’t the sugary stuff we’re used to, but something deep, earthy, and almost sacred. This smoothie is my attempt to recreate that feeling of groundedness before a long day of walking through new streets. I use raw cacao powder and a bit of almond milk to keep it light, but the real secret is a pinch of cinnamon that reminds me of the spice stalls near the Zócalo.

    Coastal Mango and Lime Zest

    Refreshing Coastal Mango and Lime Zest drink.

    Living by the coast for so many years, I developed a deep craving for flavors that feel bright and unapologetically acidic. This recipe was inspired by a tiny fruit stall I frequented in a seaside village, where the air always smelled of salt and ripening citrus. It’s essentially sunshine in a cup, using ripe mango and a generous squeeze of lime to wake up your palate.

    The Istanbul Fig and Honey Blend

    The Istanbul Fig and Honey Blend smoothie.

    There is something about the way figs are sold in the markets of Istanbul—stacked in heavy, dusty piles, smelling of honey and sun-warmed earth—that stays with you. This smoothie is much more subtle than your typical fruit blend; it’s sophisticated and uncomplicated. I use dried figs soaked in water to soften them, which gives the drink a deep, jammy consistency that feels much more substantial than a standard juice.

    Kyoto Matcha and Toasted Rice

    My time spent in Japan taught me the importance of ritual and the beauty of bitter, green notes. This isn’t a dessert; it’s a way to center yourself. I use a high-quality matcha powder that has a bit of a grassy, umami edge to it, which balances beautifully against a base of creamy oat milk. It feels very intentional, a stark contrast to the frantic pace of modern life.

    Mediterranean Almond and Date Fuel

    Whenever I travel through the Levant, I am constantly struck by how much they rely on dates for everything from bread to sweets. They are the ultimate travel food—dense, sweet, and incredibly satisfying. This smoothie is my way of packing that Middle Eastern pantry into a quick breakfast. I blend soft Medjool dates with almond butter to create something that feels incredibly luxurious and rich.

    Finding Flavor in the Routine

    Don’t be afraid to swap out standard supermarket staples for whatever is peaking in season at your local market; that’s where the real magic happens.

    A morning ritual isn’t just about nutrition; it’s about taking a quiet moment to ground yourself before the chaos of a new city takes over.

    The best ingredients often come from the most unassuming places, so look past the bright packaging and follow the scents of the street stalls.

    The Soul of the Morning

    A smoothie isn’t just a quick way to fuel a day of walking; it’s a liquid map of where you are, built from the bruised peaches of a roadside stall or the deep, earthy sweetness of spices found in a hidden market stall.

    Anouk Verhoeven

    Finding Your Own Rhythm

    Whether you’re reaching for the creamy textures of the mango-turmeric blend or the deep, earthy tones of the cacao-date smoothie, these recipes are more than just quick fuel for a busy morning. They are small, intentional ways to ground yourself before the day begins to pull you in a dozen different directions. I’ve found that once you start experimenting with these combinations—swapping out a handful of spinach for some local berries or adjusting the sweetness with a bit of honey—you stop following a recipe and start listening to what your body actually needs. It’s about taking those seasonal, vibrant ingredients and turning them into a reliable morning ritual that works for you.

    At the end of the day, my travels have taught me that the most meaningful connections aren’t always found in grand monuments, but in the quiet, sensory details of our daily lives. A well-made smoothie, enjoyed while watching the light shift across your kitchen table, can be a profound act of self-care. Don’t feel pressured to make every breakfast a masterpiece; instead, aim to make it a moment of stillness. I hope these flavors inspire you to find your own version of a perfect morning, no matter where in the world you happen to be waking up today.

    Frequently Asked Questions

    Can I make these without a high-speed blender if I'm staying in a small Airbnb with just the basics?

    Honestly, I’ve spent plenty of mornings in tiny Airbnbs with nothing but a basic, noisy blender that sounds like it’s fighting for its life. If you’re really stuck without one, don’t stress. You can mash softer fruits like bananas or mangoes with a fork and whisk in your liquids. It won’t be perfectly silky, but there’s something quite grounding about that rustic, textured feel—it feels a bit more like a real, handmade breakfast.

    Are there ways to adapt these recipes if I can't find those specific seasonal fruits in my local supermarket?

    Honestly, don’t let a missing ingredient stall your morning. When I’m in a new city, I rarely find exactly what I wrote in my notebook. If you can’t find that specific seasonal star, just look for whatever is looking most vibrant at your local market or even your supermarket. Focus on the texture and the vibe—swap a mango for a peach, or frozen berries if fresh aren’t peaking. It’s about the ritual, not perfection.

    How do I keep these from getting too thick or losing their texture if I'm taking them on a morning walk through a market?

    I’ve learned this the hard way while wandering through humid markets in Southeast Asia. To keep things from turning into a thick sludge, I always blend with a bit more liquid than I think I need—usually coconut water or a splash of oat milk. Also, I pack a few extra ice cubes in a small insulated pouch. It keeps the texture bright and refreshing, even when the morning sun starts to hit.